To optimize a small kitchen on a budget, start by decluttering to reveal real layout possibilities and save money upfront. Maximize vertical storage with shelves, hooks, and tall cabinets, and group tasks into two to three zones for a smooth workflow. Choose budget-friendly, compact appliances and light, reflective surfaces to brighten the space. Use under-cabinet lighting for task focus and keep essentials within easy reach. If you want more practical tweaks, you’ll discover them further on.
Key Takeaways
- Assess space and budget first; map dimensions, doors, outlets, and reconfiguration limits to maximize flow within existing area.
- Create 2–3 zones (prep, cooking, cleaning) and keep daily essentials reachable; use labeled bins for quick returns.
- Maximize vertical space with tall cabinets, wall racks, and ceiling-mounted storage; hang lightweight tools on magnetic strips.
- Use reflective surfaces and light colors; add under-cabinet lighting and glossy backsplashes to brighten the kitchen.
- Choose compact, energy-efficient appliances, maintain cohesive colors, and favor multipurpose tools to save space and cost.
Assess Your Kitchen: Identify Space and Budget Limits

Before you start making changes, map out what you actually have to work with: measure the space, note door swings, and list appliances, cabinets, and outlets you’ll need to keep. You’ll assess space to see how much you can reconfigure without expanding. Next, set a practical boundary for your project by determining budget; ground your choices in what’s affordable and durable. Consider traffic flow, task zones, and how you’ll access plumbing or electricals. With a clear map, you’ll spot constraints and opportunities—like tight corners, awkward door clears, or shallow storage—that influence solutions. Prioritize items that deliver the biggest bang for your buck, and document costs for each, so you and your household stay aligned. This approach builds belonging through shared planning and a sensible, achievable plan. Establish a breathable plan that factors in long-term comfort and adaptability, ensuring your selections support stable use and pelvic-friendly seating principles as you optimize the space. planning
Declutter First to Create Real Layout Efficiency
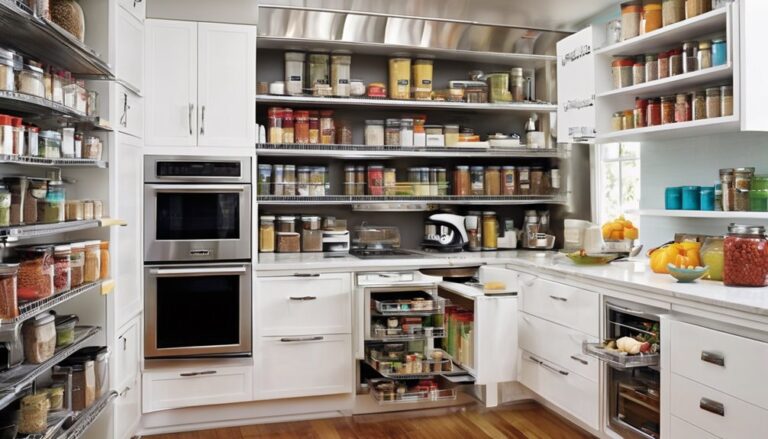
Start by decluttering as you organize, so you only keep what you actually use. As you clear surfaces, plan for vertical storage—shelves, hooks, and tall cabinets—to maximize every inch without expanding cost. Keep items you use often within easy reach and store the rest up high or in labeled bins to maintain a real, efficient layout. Add a quick test to ensure your layout maintains kPa suction for future vacuum sealer needs while you shop the right model.


Declutter As You Organize
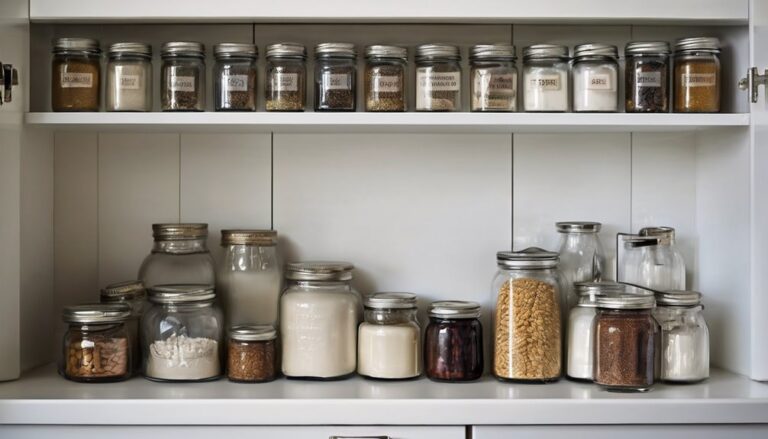
Decluttering as you organize isn’t about tossing everything out—it’s about keeping what you truly use and need, so you can see where each item belongs. You’ll create a calmer kitchen by pairing declutter rituals with practical choices, turning space into a welcoming, usable layout. Focus on what earns its keep, then group like items to simplify routines and cut duplication. Sort, decide, and store in even, easy-to-reach zones. Keep only daily essentials, then rotate seasonal tools. Label bins for quick returns and minimal waste. As you apply this mindset, you’ll feel a sense of belonging in a budget-smart, efficient space. Less clutter means clearer counters, faster meals, and more room to enjoy cooking with family and friends. storage efficiency
Maximize Vertical Storage
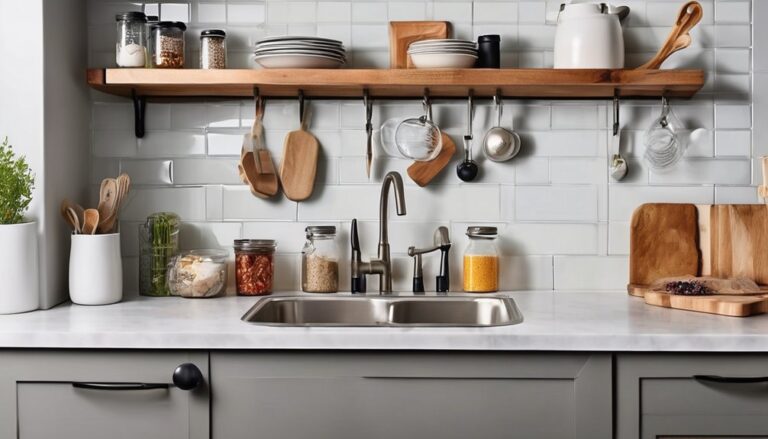
Now that you’ve pared down and organized what really earns its keep, it’s time to free up wall space by maximizing vertical storage. Start with a clear plan: measure walls, list essentials, and pick compact solutions. Use vertical stacking to group similar items—pots above pans, mugs on a rack, spices in a slim pullout. Install ceiling mounted racks where overhead space is wasted, keeping frequently used items within arm’s reach. Hang lightweight tools on magnetic strips to reduce drawer clutter. Opt adjustable shelving to adapt as your needs change, and consider wall-mounted baskets for produce or snacks. Label bins for quick access, and keep one small zone free of clutter to reinforce the habit. Smart vertical storage makes the kitchen feel larger and more inclusive, with heavy-duty / big & tall chairs insights guiding how you plan durable storage that lasts.
Smart Storage Hacks That Maximize Every Inch

Need every inch of a tiny kitchen to count? You’ll love these smart storage ideas that stretch each corner without breaking the bank. Use simple, sturdy solutions that feel like belonging, not clutter. For lasting comfort and durability in your setup, choose options with a solid weight rating and stable construction weight capacity.
Budget-Friendly Appliances That Make a Difference
Why splurge when you can upgrade the everyday with budget-friendly appliances that actually make a difference? You don’t need luxury to function well in a small kitchen. Look for budget appliances that compress power into compact forms, because efficiency matters more than size alone. Prioritize reliability, simple controls, and easy maintenance, so you stay confident in your choices. Compact options like 1- to 2-slice toasters, small convection ovens, and compact dishwashers can free counter space without sacrificing performance. Buy versatile tools that multitask, saving energy and money over time. When you shop, compare energy ratings and warranty terms, and choose durable, repairable models. You’ll feel a sense of belonging in a space that works smoothly, feels intentional, and reflects your budget-conscious mindset. If you want quiet operation while lifting and adjusting multiple devices, look for models with anti-collision or stability features to keep everything balanced quiet operation.
Lighting and Fixtures That Make a Small Kitchen Feel Bigger
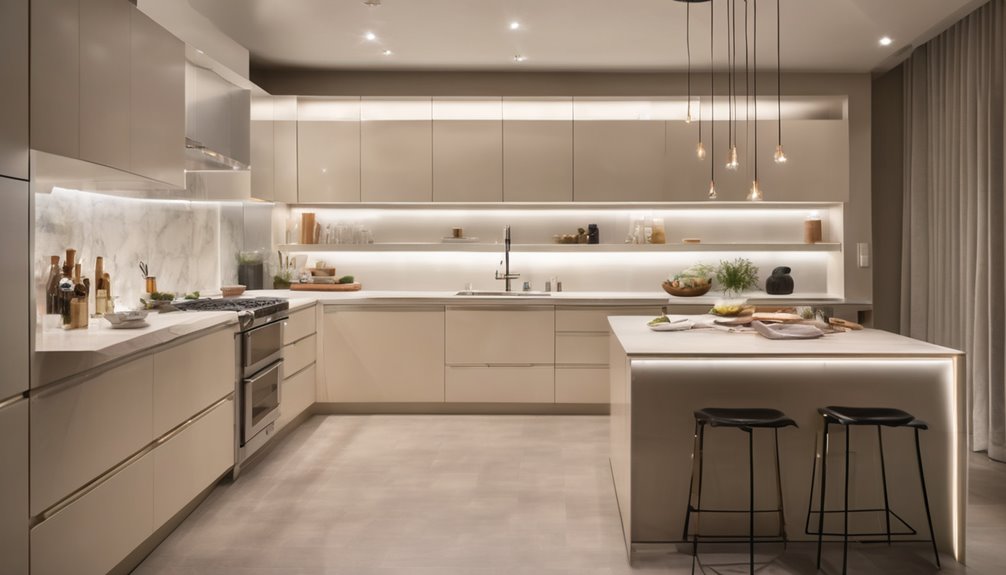
You can brighten a small kitchen by maximizing natural light sources, like keeping curtains sheer and arranging furniture to avoid blocks of sunlight. Pair that with reflective surfaces—shiny backsplashes, light-painted walls, and glass or metal accents—to bounce light around without costing a fortune. Add under-cabinet lighting for focused task light and a sense of depth, which feels bigger without a big hit to your budget. Incorporating 24/7-rated durability and easy maintenance from your chair-and-furniture choices can also streamline long days in a tight space, ensuring you stay comfortable and efficient while cooking and cleaning. 24/7 use
Natural Light Sourcing
Natural light can make a small kitchen feel twice as big, so start by clearing sightlines: trim curtains or blinds and move furniture away from windows to invite daylight deeper into the room.
You’ve got practical ways to boost natural light sourcing without breaking the bank. Start with window placement—keep openings unobstructed and consider sheer or light fabrics to maximize brightness. Use light, reflective colors on walls and cabinets to bounce daylight, and add a small mirror or two opposite windows to amplify the glow.
- reposition furniture to uncover window access
- choose sheer curtains and pale tones to reflect light
- place a compact mirror near a window for depth
These tweaks foster belonging and make your kitchen feel airy, efficient, and welcoming. 80-Inch Tops
Reflective Surfaces Use
Maximize the illusion of space with reflective surfaces that bounce light around your small kitchen. You’ll feel instant openness when you add budget-friendly mirrors or glossy finishes on backsplashes and cabinet fronts. Place mirrors opposite windows or light sources to multiply daylight without wiring extra fixtures. Choose lightweight, shatter-resistant options and frame them simply to keep costs down. Use stainless or glass panels as cabinet doors to create a cohesive, airy vibe that also cleans easily. Glossy countertops or tiled backsplashes reflect more light than matte textures, making counters feel farther apart. Keep edges clean and seams minimal, so the room reads spacious rather than busy. Reflective surfaces help you belong in a brighter, more functional kitchen without breaking the bank. DPI settings play a role in how you perceive the brightness and precision of screen-based planning tools you might use while organizing your space.
Under-Cabinet Illumination
Under-cabinet illumination quietly transforms a compact kitchen by giving you task light exactly where you need it. When you pick practical setups, you save space and money, while boosting visibility for prep and cleaning. Think simple, linear LEDs or plug-in strips that tuck under the lip of the cabinet, avoiding bulk fixtures. With the right under cabinet lights, you’ll notice brighter counters and a roomier feel, thanks to fewer shadows and more reflected light. Focus on energy-efficient options and color temperature around 3000K for warm, inviting tones that still read as modern. Use illumination techniques that are easy to install, maintain, and adjust as your needs shift.
- Budget-friendly LEDs
- Simple plug-in strips
- Dimmable options for control
Create Functional Zones on a Budget
Grouping your kitchen into clear zones helps you work faster and waste less, and you can do it on a budget by rethinking what already exists—no ornate remodel required. You’ll map two or three core areas: prep, cooking, cleaning, plus a small backup station for devices or spices. Use creative zoning to assign tasks by flow, not by furniture. Move frequently used tools to reachable spots near the prep counter, and group related items in labeled bins or shallow drawers to reduce rummaging. Embrace budget scoping: reuse trays, repurpose jars, and pull shelves from old cabinetry. Keep colors cohesive to reinforce zones, so family members know where to land. This approach builds belonging, saves time, and stays affordable. In addition, consider selecting chairs or stools with adjustable height and footrests to accommodate standing-desk setups if you also use a standing-height counter for quick prep breaks ergonomic comfort and maintain long-term comfort while cooking.
Frequently Asked Questions
How Can I Measure My Kitchen’s Real Usable Space Accurately?
You’ll measure your kitchen’s real usable space by mapping a precise usable footprint and noting clearances around obstacles. Start with a tape measure, measuring walls, cabinet depths, and appliance footprints. Create a drawing to scale, mark door swings, and test with furniture placed virtually to avoid clutter. Use space planning tips like prioritizing walkways and easy access. This practical, budget-conscious approach helps you see measuring layout gaps clearly, fostering belonging as you refine your kitchen’s layout.
What Are the Fastest DIY Upgrades for a Bigger-Feeling Kitchen?
The fastest upgrades you can make are simple, budget-friendly changes that instantly open space. Swap heavy curtains for sleek blinds, declutter surfaces, and add a fold-down table to reclaim counter area. Use light colors and mirrors to reflect light, making the room feel larger. Install slim, open shelving for airiness. Budget-friendly upgrades include LED under-cabinet lighting and energy-efficient appliances you actually use. You’ll feel welcomed, organized, and part of a growing, practical kitchen community.
Which Non-Electric Tools Save the Most Space in Small Kitchens?
A smart kitchen is a ship with compact storage hidden in every drawer. You’ll save space by choosing non-electric options like collapsible measuring cups, magnetic spice tins, and foldaway cutting boards. These versatile utensils keep counters clear and yield big results on a budget. They’re space saving, affordable, and easy to share with others who care about belonging. You’ll feel organized, intentional, and ready to cook together without clutter.
How Do I Choose Color Schemes That Visually Expand a Kitchen?
To choose color schemes that visually expand your kitchen, stick with light neutrals and cool tones, then add small pops of color through accents. Use color psychology: airy whites, creams, pale blues or greens feel open and calm, while fewer bold surfaces prevent crowding. Create visual widening by matching cabinets to walls, keeping countertops light, and incorporating reflective surfaces. This budget-friendly approach invites belonging, feels practical, and helps your space look larger and cohesive.
What Maintenance Routine Keeps Small Appliances Efficient Long-Term?
A comic sketch unfolds: you, a heroic toaster, wrestling a stubborn blender out of a cabinet, then banishing clutter with a sigh. For a solid maintenance routine, clean coils, dust vents, and wipe surfaces weekly; unplug before checks. Schedule monthly filter and gasket inspections, and descale when mineral buildup appears. This keeps appliance longevity in sight and your budget intact, proving you belong in a savvy team that cares for every gadget.