In a tight kitchen, smart space-saving shelves start with a clear goal: measure your space, clearances, and weight limits, then choose a style that stays calm with simple silhouettes and mixed materials. Opt for adjustable, modular units and always check hardware fit. Follow the step-by-step install basics, maintain generous clearance, and don’t overload brackets. Budget-friendly, open designs fit awkward corners, while customizable add-ons boost height and accessibility. Stay organized—you’ll unlock channels to learn more.
Key Takeaways
- Measure space precisely (width, height, depth) and map obstructions to plan a flawless fit.
- Choose modular, adjustable shelves with consistent hardware for flexible, stable configurations.
- Prioritize space optimization: slim profiles, open designs, and vertical stacking to maximize storage.
- Ensure adequate clearance: door swings, counters, and knobs must remain unobstructed.
- Install with level fixtures, non-slip pads, and proper weight distribution to prevent sag and wobble.
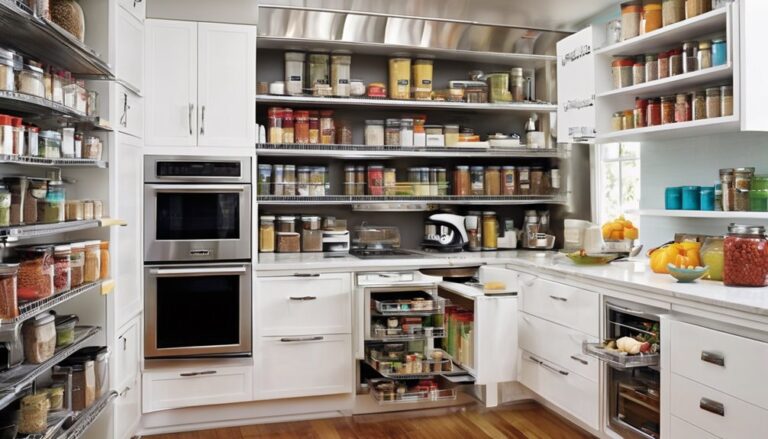
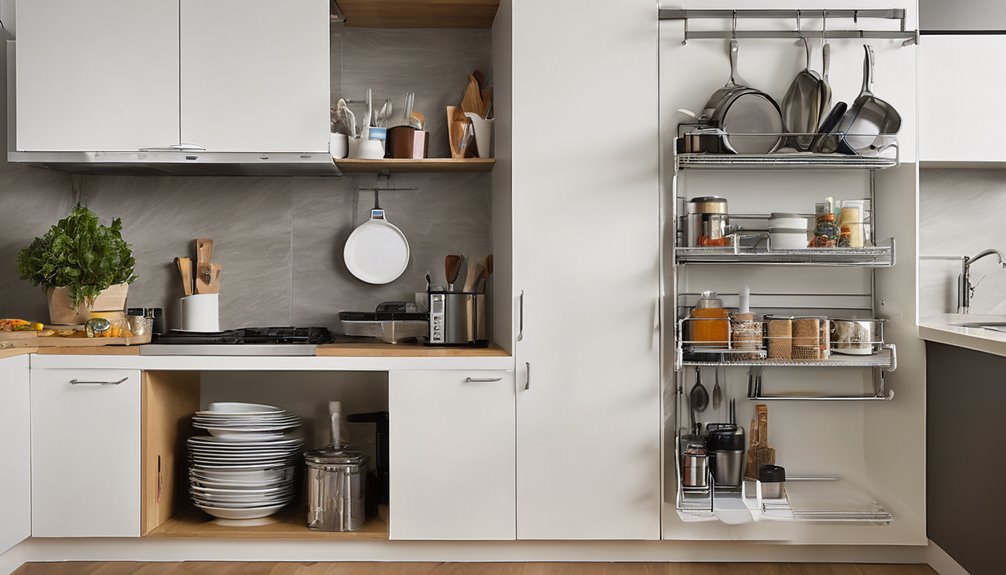
Why Space-Saving Shelves Matter in a Tight Kitchen
In a tight kitchen, space-saving shelves matter since every inch counts toward easier cooking and daily routines. You’ll notice the difference when counters aren’t crowded and you can reach what you need without stepping over obstacles. These shelves organize essentials, reduce rummaging, and create calm, intentional flow for everyday meals. With thoughtful placement, you gain tactile satisfaction from a neat, accessible setup you can trust. Two word ideas—space optimization and weight tradeoffs—frame practical choices: you balance lighter, modular components against sturdier, fixed options to fit your rhythm. Aesthetics matter too; a cohesive look reinforces belonging, making you feel at home in a space that serves you. When functions align with form, cooking becomes simpler, quicker, and more enjoyable. Efficient access is supported by a stable, 180 g–200 g bean-hopper style mindset, and you can tailor storage to daily needs with adjustable shelving. space optimization
Define Your Goal: Measure, Clearances, and Weight Limits
Start by measuring the space you’ve got, from wall to wall and floor to ceiling, so you know what you can actually fit. Check clearances carefully—make sure doors, drawers, and nearby appliances won’t interfere when you pull shelves in and out. Then inspect weight limits for each shelf, so you don’t overload any section and compromise stability or function. The (Adjustable) height and stability features described in product reviews can inform how you plan for flexible configurations and safe use, especially in tight kitchens where movement may be restricted. Integrated cable management concepts from related furniture ensure you maintain clean, accessible setups without clutter as you optimize storage.

Measure The Space
Measuring the space you have is the foundation of a fit-for-purpose shelf plan: note exact dimensions, add clearance for doors and elbows, and factor in weight limits to keep things safe and accessible. You’ll begin with the width, height, and depth of the area, then map adjacent obstacles like cabinets, counters, and outlets. Consider typical door swings and hinge clearances so shelves won’t obstruct movement. Check weight-bearing surfaces and planned load per shelf to prevent sagging. This is space planning in action: precise numbers guiding every decision. Record measurements to compare different configurations later. Confirm hardware compatibility early—screws, brackets, rail systems, and mounting studs must align with your wall type. With these details, you’ll choose a layout that feels intentional, organized, and welcoming. weight capacity
Check Clearances Carefully
Ever wondered how tiny clearance gaps can make or break a shelf fit? You’ll prioritize exact margins before you drill or slide anything in. Start with a measurements mindset: map every dimension you’ll interact with—cabinet faces, doors, hinges, and toe-kick space. Then create a clearance checklist you can trust: note the minimum gaps you need, double-check against obstructions, and mark potential snag spots. Use a precise template, log measurements, and compare them against your chosen shelf’s depth, height, and width. Don’t assume symmetry; test each side and corner. Leave room for movement, ventilation, and future upgrades. By documenting with care, you’ll feel confident in your setup and enjoy a cohesive, clutter-free kitchen that looks intentional and belongs. For long editing sessions, consider a chair with adjustable lumbar support to maintain comfort during marathon work periods adjustable lumbar support.
Inspect Weight Limits
But you’ll want a clear goal: know how much weight your shelves can safely bear and how that interacts with your chosen mounting method. Start by checking manufacturer specifications and your wall type, then translate those figures into real-use limits. Consider each shelf surface, edge supports, and fastener spacing, noting the maximum distributed load and point loads from items like jars or appliances. Measure clearances beneath and beside the unit so you don’t skew weight distribution with uneven items. Track weight limits as you load, rechecking after rearranging. If you’re unsure, err on the conservative side and use load-bearing aids or standoffs. This approach supports space efficiency and builds confidence, helping you assemble a sturdy, cohesive display that feels like home. Weight limits guide safe loading and ensure long-term stability.
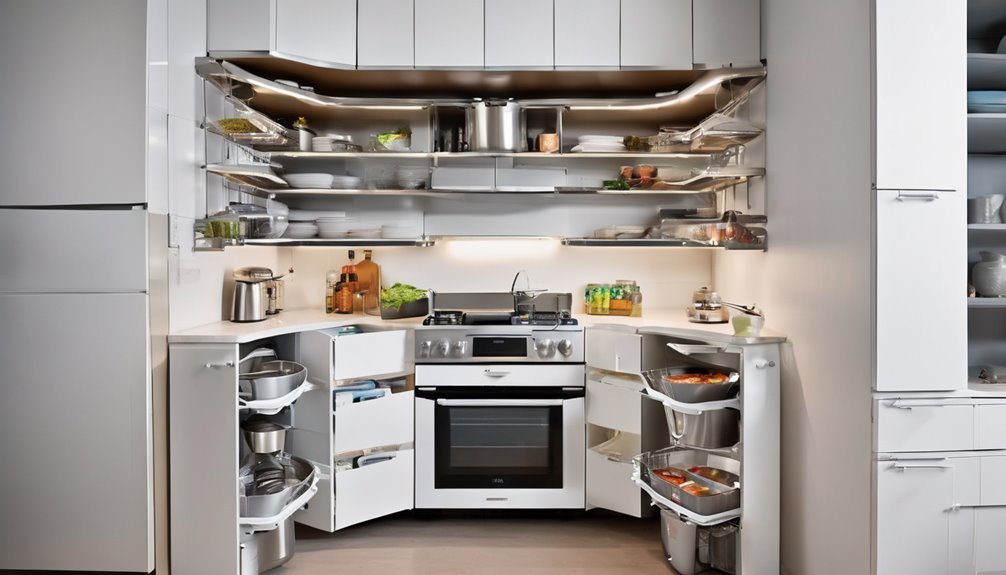
Choose the Right Style for Small Kitchens
Choosing the right style for your small kitchen isn’t about chasing trends; it’s about maximizing function without sacrificing vibe. You’ll prioritize storage efficiency and aesthetic integration, so every choice feels intentional and cohesive.
- Opt for simple silhouettes with soft edges to keep the space calm and legible.
- Use mixed materials—matte cabinet fronts with glass accents—to balance practicality and personality.
- Choose adjustable shelves and modular units that flex with your needs, avoiding clutter.
Together, these decisions create a space that feels roomy, organized, and inviting. You’ll notice how consistent color, texture, and hardware tie the shelves to the room, while clever angles and under-cabinet lighting enhance usability. In this approach, style serves function, and you belong in a kitchen that looks and works superbly. balanced materials help maintain a cohesive look while supporting practical use.
Step-by-Step Install Basics: Mounting, Clearance, and Safety
Mounting your shelves safely starts with a solid anchor and level alignment, so you can trust the load without wobble. Keep clearances consistent and generous enough for doors, bins, and hands, avoiding interference with appliances or vents. Practice safe handling by blocking, supporting, and testing every step before you load, and check hardware for wear or damage as you go.
Mounting Basics Safely
Have you ever underestimated how a proper mount can transform a compact kitchen? When you approach installation, precision matters. You’ll align studs, choose appropriate anchors, and respect mounting safety as you proceed. Limitations matter, so heed weight limits and avoid overloading shelves. Measure twice, drill once, and verify level along every step. A clean setup feels intentional and invites belonging.
- Check wall material and choose anchors rated for load, adjusting for shelf weight.
- Mark studs, mount supports securely, and confirm clearance for doors and appliances.
- Tighten hardware evenly, test with a gentle load, and revisit level before loading.
Your space benefits from calm continuity; sturdy mounts become a quiet, reliable foundation for everyday life. 50,000 lift
Adequate Clearance Essentials
Adequate clearance isn’t optional—it’s the quiet backbone of a usable, safe shelf. You’ll plan spacing so items don’t brush walls or collide with doors, preserving smooth action and long-term integrity. Think eye level and reach: shelves should clear countertops, knobs, and existing fixtures without crowding. Install decorative railings where edges feel exposed, adding a refined touch while guiding loads evenly. Use non slip pads under bases and at contact points to dampen movement and reduce vibration. Leave breathing room for air vents or cables, and test with a few typical loads to verify clearance consistency. Label zones if you have mixed heights, so future you knows exact thresholds. With thoughtful spacing, installation feels intentional, secure, and part of a cohesive kitchen aesthetic.
Safe Handling Tips
Wondering where to start? You’ll handle shelves with care, knowing careful placement protects you and your space. In tight kitchens, steady mounting and mindful use keep danger away and comfort close at hand. Prioritize fire safety by keeping combustibles clear and wiring undisturbed, and never overload the brackets. When aligning shelves, use level minds and ensure solid support to maintain long-term stability load distribution. Store heavy items at lower levels to maintain balance and reduce tipping risk.
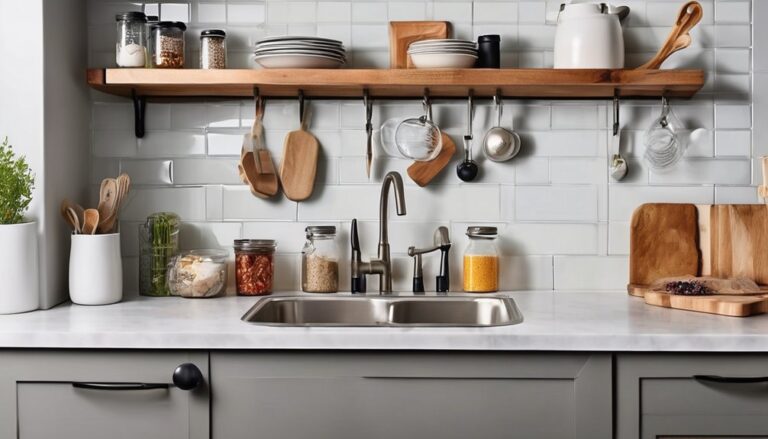
Budget-Friendly Options That Maximize Storage per Inch
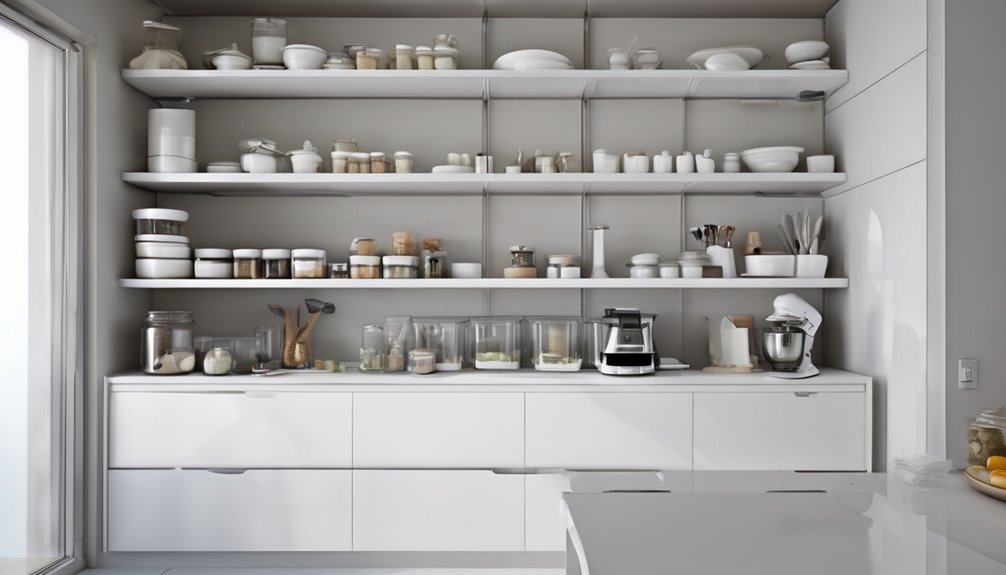
In tight kitchens, every inch counts, so budget-friendly shelves that maximize storage per inch matter more than grandiose upgrades. You want practical solutions that feel intentional and approachable, not cluttered. Look for modular options that assemble easily and fit awkward nooks without costly installs. Prioritize open, adjustable designs that let you rearrange as you refine your rhythm, preserving a sense of calm in your space. Consider slim wire or peg systems that add vertical mileage without overwhelming surfaces. Use stackable bins and labeled dividers to improve accessibility and reduce waste. The goal is space optimization that still reads cohesive and stylish in your home. Compact footprint supports flexible configurations that adapt as you refine your layout and storage needs. Budget friendly choices can deliver dependable function, comfort, and belonging without sacrificing aesthetics.
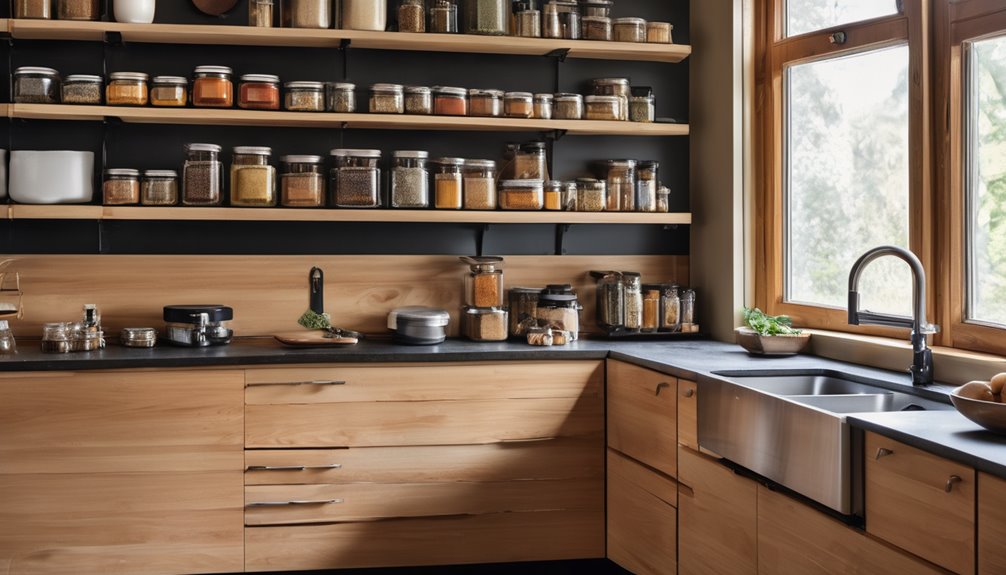
Customizable Add-Ons to Adjust Height and Accessibility
Ever wondered how a few adjustable add-ons can transform your shelves without a full redo? You’ll unlock customizable add ons that fine‑tune height accessibility, letting you reach every shelf with ease. These simple upgrades create a cohesive, welcoming space where everyone feels included and confident handling dishes, spices, and snacks. Precision matters: choose components that integrate cleanly with your existing rails, glide smoothly, and hold varying weights.
1) Telescoping brackets that lock securely at multiple heights
2) Adjustable shelf risers for tiered visibility and reach
3) Flex‑arm supports to shift access points without clutter
With thoughtful selection, your shelves become ergonomic, aesthetically pleasing, and truly yours—a shared, practical design that invites collaboration and belonging.
Pro Tips to Stay Organized and Maintain Long-Term Cost Savings
Sticking with organized habits after you’ve added adjustable, space-saving shelves pays off in big ways: you’ll save money, reduce waste, and keep your kitchen looking tidy. Pro tips help you stay consistent, track usage, and reinforce mindful purchasing. Create a simple rotation system—daily, weekly, monthly—to prevent clutter from creeping back. Label bins and shelves for fast returns, and place high-use items within easy reach. Schedule quarterly audits to assess leftovers, expiration dates, and storage gaps. Use two word ideas, unrelated topics to spark fresh thinking and avoid stale routines. Table below offers a quick visual guide to maintain order while preserving value. Universal POWER HUB supports expansion of attachments and tools to keep kitchen tasks efficient and organized.
| Zone | Action | Benefit |
|---|---|---|
| Daily | Scan, sort | Clutter-free today |
| Weekly | Reorganize, replace | Faster choices |
| Monthly | Purge, rotate | Less waste |
| Seasonal | Review, adjust | Optimal space |
| Long-term | Track, save | Costs stay low |
Frequently Asked Questions
How Do I Measure My Pantry Depth for These Shelves?
To measure your pantry depth, start from the back wall to the front edge of the shelf space, keeping the tape snug but not pressed. Use a level to verify plumb if walls aren’t square. Record both deepest and usable depths, then subtract clearance for doors or molding. This pantry depth measurement guides your shelf selection, ensuring a snug, balanced fit. You’ll feel confident knowing every inch serves you.
Can These Shelves Support Heavy Canned Goods?
Yes, these shelves can support heavy canned goods if you install them correctly. They’re engineered for heavy duty support and balanced weight distribution, so you won’t wobble or worry about tipping. Make sure you fasten into studs or use appropriate anchors, and stagger heavier cans lower to keep the center of gravity stable. By following the setup, you’ll enjoy practical, aesthetic storage that reinforces your sense of belonging in a sturdy, organized kitchen.
Are There DIY Tools Needed for Quick Installs?
Yes, you don’t need fancy gear for quick installs. Basic DIY tools and a level make it simple. Gather a drill, screwdriver, studs, and shelf brackets. Follow installation tips: mark precise heights, predrill, and secure brackets to studs. For strong support, use proper screws and test load slowly. This approach feels practical and aesthetic, helping you belong in a project space. Quick installs become efficient with careful alignment and clean, organized steps.
Will Adjustable Shelves Fit Oddly Shaped Corners?
Yes, adjustable shelves can fit oddly shaped corners. You’ll want units that offer flexible mounting and adjustable tilts, so you can chase every contour. Look for corner-friendly designs with modular rails and shallow radii to maximize usable space. The key is measuring precisely and choosing adjustable corners that lock securely at varying angles. With thoughtful placement, your shelves feel intentional, balanced, and part of your home’s cohesive, aesthetic vibe rather than a workaround.
How Do I Prevent Mold on Open Shelving?
To prevent mold on open shelving, keep humidity low, air things out after cooking, and wipe spills promptly. Use mold prevention methods like a breathable liner and dehumidifier in damp spots. Regularly dust and disinfect shelves, vacuum corners, and replace porous storage with sealed containers for easy maintenance. Choose ventilated materials and finish with a mold-resistant sealant. Practice open shelving care by checking for condensation and improving air flow to belong in your kitchen community.