Kick off with a solid budget and stick to a 10–15% contingency, tracking every expense in real time. Upgrade surfaces on a dime with laminate, butcher-block contact, or paintable epoxy, and seal or edge-band for durability. Do a simple cabinet makeover, swap hardware, and add warm, layered lighting—from ambient to task—to boost vibe without rewiring. Choose energy‑smart appliances and use timers to cut standby power. Leave room for quick storage hacks and one‑week tweaks to maximize impact. You’ll uncover more practical tips after this brief pause.
Key Takeaways
- Set a kitchen budget with must-haves, nice-to-haves, and a 10–15% buffer, tracking every expense in real time.
- Choose durable, budget-friendly materials (laminate, butcher-block contact, vinyl) with reversible upgrades like peel-and-stick films and edge banding.
- Use a layered lighting plan (ambient, task, accent) with dimmable options to transform the space affordably.
- Implement smart, energy-efficient appliances and monitoring (Energy Star, energy monitors, smart outlets) to cut ongoing costs.
- Optimize storage and quick cosmetic refreshes (adjustable shelves, pull-out organizers, updated hardware) to maximize impact with minimal spend.
Set a Realistic DIY Kitchen Budget: A Step-by-Step Plan
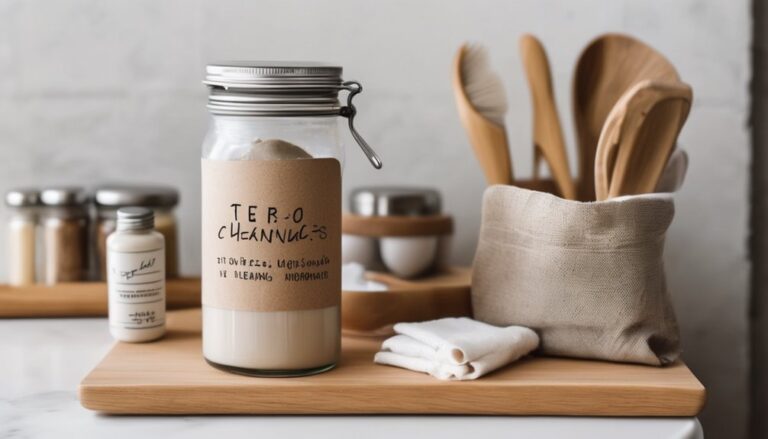
Before you pick a number, decide what you must keep and what you can live without. You’ll map a realistic DIY kitchen budget with a simple, step-by-step plan. Start with a budget canvas: list must-haves, nice-to-haves, and nonessentials. Assign realistic costs to each item, then total a ceiling you won’t exceed. Use paint palettes as a metaphor for priorities: choose durable, visible upgrades first, then secondary touches. Set a time frame and allocate a buffer for surprises—10 to 15 percent works well. Track every expense in real time, updating your budget canvas as you confirm prices. Seek affordable options without sacrificing function: refinish rather than replace, repurpose existing fixtures, and source secondhand where practical. Communicate progress with household, celebrate small wins, and keep momentum toward your cohesive, budget-smart kitchen.
Upgrading Counter Surfaces on a Budget: Options and Costs
You’ll weigh budget-friendly materials, from laminate to butcher block, against your needs for durability and style. Consider installation costs and whether you’ll tackle it yourself or hire help, plus ongoing maintenance to keep the surface looking good. We’ll compare longevity and care requirements so you can choose a countertop that fits both your wallet and your routine. A key factor is choosing materials backed by real durability and safety certifications to ensure long-lasting performance in a busy kitchen NSF/CETL.
Budget Friendly Materials
What are your cheapest options for upgrading counter surfaces without sacrificing durability? You’ll love budget friendly choices that minimize waste through material reuse. Options like laminate sheets over existing counters, solid surface vinyl, and butcher-block contact boards deliver durable looks without full replacements. Pick quick, reversible upgrades: peel-and-stick films, edge banding, and paintable epoxy coatings. For higher durability on a budget, consider plywood or MDF with a dense polyurethane topcoat. Use a simple sealant to guard against moisture. Table shows quick comparisons:
| Material | Pros |
|---|---|
| Laminate over existing | Easy install, affordable |
| Vinyl or epoxy coating | Durable, water resistant |
Table continues with budget-friendly tips and note on material reuse to maximize value and foster a sense of belonging in your kitchen journey. Affordable durability offers a practical path to long-lasting surfaces that fit small budgets while maintaining style and functionality.
Surface Installation Costs
So, how much will it cost to upgrade your counter surfaces on a budget? You’ll find options that fit two word discussion ideas and still feel like you belong in the kitchen bạn. Costs vary by material, labor, and space, but you can estimate from $20–$60 per square foot for DIY installs to higher rates if you hire pros. Here are practical paths that keep it affordable and approachable:
- Laminate overlays and edge trim for quick surface installation
- Butcher block kits you can cut and seal yourself
- Adhesive-backed vinyl or acrylic sheets for a seamless look
- Recycled or surplus slabs to reduce material spend
Plan, measure, and follow instructions closely to stay confident and connected with your home upgrade. Gooseneck
Longevity And Maintenance
While budget upgrades save upfront, longevity and maintenance determine true value. You’ll want counter surfaces that endure daily use without breaking the bank, so choose durable options and plan upkeep now. For budget durability, seal and reseal as recommended, wipe spills promptly, and use cutting boards to protect finishes. Long lasting maintenance means simple routines: clean with non-abrasive products, reapply protective coatings when needed, and repair chips early to prevent spreading. Below is a visual to guide decisions.
| Surface Type | Upkeep Time | Typical Cost |
|---|---|---|
| Laminate | Quick touch-ups | Low |
| Quartz | Moderate care | Moderate |
| Solid Wood | Regular oils | Moderate-High |
| Butcher Block | Oil/condition | Moderate |
| Stainless Steel | Wipe down | Low |
You belong here, making smart, lasting choices together.
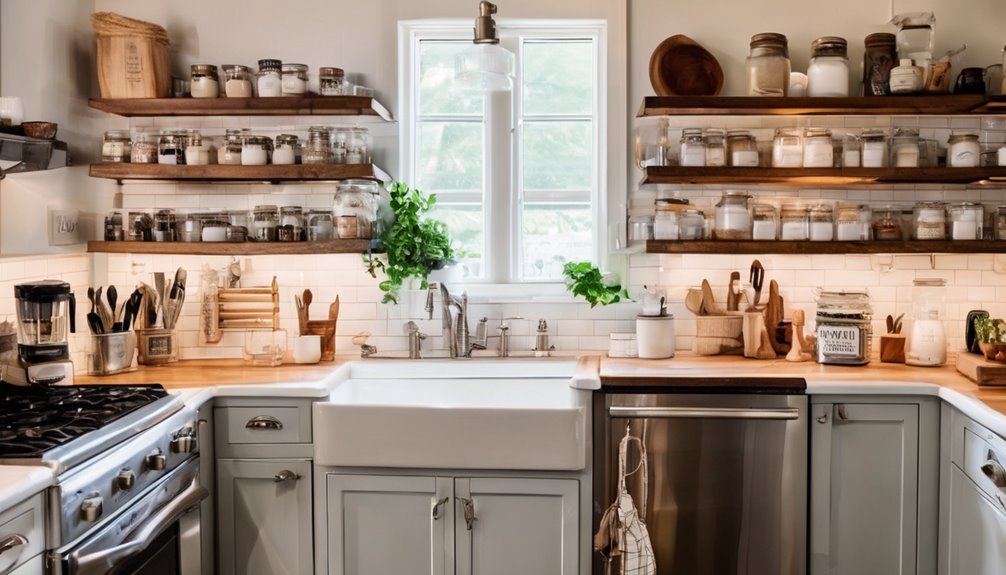
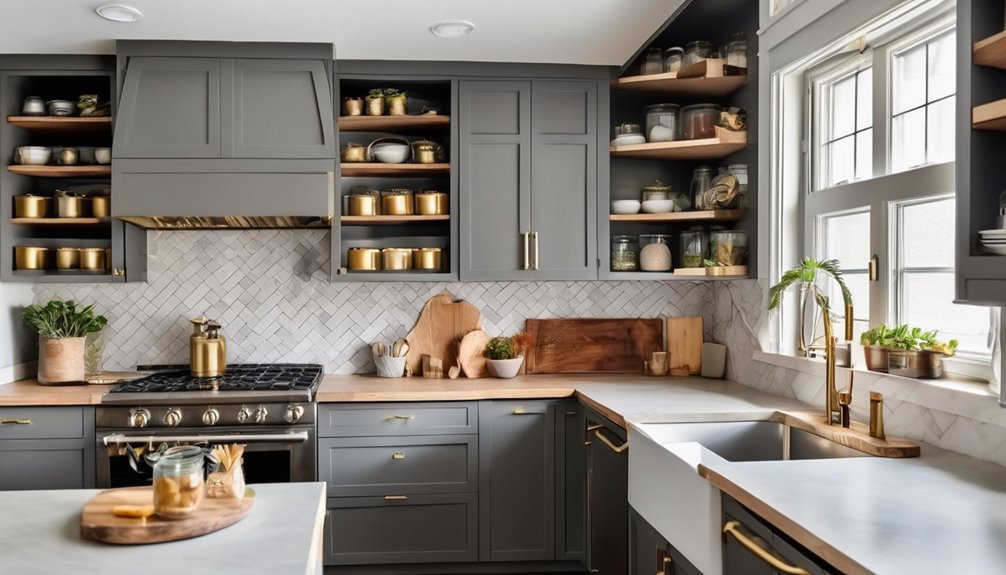
Simple Cabinet Makeovers That Look Brand New
Want a fresh kitchen vibe without breaking the bank? You can achieve brand-new-looking cabinetry with smart, simple steps. Your goal is a cohesive, inviting space that feels like you belong there, not a showroom. A budget-friendly approach can also be enhanced by choosing enduring finishes that mimic real wood grain and protect surfaces over time durable finish.
Budget-Friendly Kitchen Lighting for Instant Impact

You can brighten your kitchen on a budget by swapping in bright, energy-efficient LEDs and layering lighting for instant impact. Use a layered lighting strategy with task, ambient, and accent lights, so you can adjust the mood without overhauling wiring. Consider dimmable options to fine-tune brightness and save energy as you mix in affordable, efficient fixtures. front digital display
Brighten On A Budget
Brighten on a budget with quick, practical lighting swaps that brighten a room without blowing your budget. You’ll feel connected as you upgrade, not overwhelm your space. Pick options that show you belong in a bright, welcoming kitchen, then watch how your mood shifts. Petite fits and careful placement can help ensure the upgrades work well for narrow spaces and smaller layouts adjustable lumbar support. These moves justify budget lighting decisions while keeping the room cohesive. You’ll save and shine, sharing the results with family and friends who notice the instant impact. quick, practical, and inviting—you’re crafting a brighter, more inclusive kitchen.
Layered Lighting Strategy
Layered lighting is your quickest path to a kitchen that feels bigger and more usable without breaking the bank. With layered lighting, you combine ambient, task, and accent layers to cover every moment you cook, prep, and polish up. Start by selecting a single ceiling fixture for general brightness, then add under-cabinet task lights to illuminate counters without glare. Use warm, dimmable bulbs to keep the space inviting. Accent lighting—like a subtle shelf glow—adds depth without clutter. Prioritize universal placements: above the sink, along work zones, and near entry points for safer navigation. Keep fixtures simple and affordable to maximize cost containment. Reassess angles and distance after a week; small tweaks lead to bigger, practical gains. Layered lighting helps you see more clearly during prep and cleanup, making the space feel more welcoming and usable. You’ll feel more confident, connected, and at home.
Dimmable, Efficient Options
Smart, energy-saving lighting can transform a kitchen in minutes. You don’t need a full redo to get warm, flexible illumination that fits your vibe. Here are dimmable options and efficient lighting ideas you can implement today:
- Swap in dimmable LED bulbs to tune mood and task brightness
- Pair with a simple dimmer switch for instant control
- Choose fixtures with integrated LEDs labeled energy-efficient
- Use under-cabinet strips to boost task light without glare
Dimmable options let you scale brightness for cooking, plating, or relaxing, while efficient lighting keeps bills and heat low. You’ll feel welcome in a brighter, calmer space that still reflects your style. Keep tests simple, and adjust gradually to find your perfect balance. Budget-smart, bake-in comfort, and shine on.
Energy-Smart Appliances That Don’t Break the Bank

If you’re upgrading on a budget, start with energy-star-rated appliances and practical, smaller steps that add up over time; the goal is to cut costs without sacrificing performance. You’ll notice big wins with compact, efficient models for refrigerators, dishwashers, and induction ranges that use less power and water. Look for built-in budget sensors that optimize cycles, so you’re never overdoing energy use during peak hours. Pair these with easy-to-read energy monitors to track consumption and savings in real time. Don’t overlook smart outlets and timers to curb standby power. Prioritize reliable brands, straightforward maintenance, and simple upgrades you can handle now—building a smarter kitchen one economical choice at a time, with lasting comfort and belonging. Gooseneck Kettle
Affordable Eco-Friendly Upgrades for Fresh Air and Clean Burns
You don’t need a big budget to keep your kitchen’s air clean and burns efficient. Small, thoughtful upgrades can make a meaningful difference without clutter or cost binges. You’ll feel welcomed and confident as you improve ventilation, burn quality, and sustainability with practical steps. Independent heat-up times and temperature stability from dual boiler setups can further support consistent cooking environments, even in tight spaces. temperature stability
Smart Storage Hacks to Free Up Kitchen Real Estate
Maximize your cabinet and counter space with targeted, practical tweaks. You’ll utilize smart storage by installing adjustable shelves, pull-out organizers, and tiered racks to maximize every inch. Use vertical space for mugs, lids, and spices, and install hooks inside cabinet doors for lightweight tools. Space optimization comes from grouping related items and labeling bins so you know where everything belongs. Embrace decluttering ideas: remove duplicates, stash rarely used appliances, and keep only daily necessities at arm’s reach. Opt for transparent containers to quickly see contents, and dedicate a dedicated drawer for snacks and wrappers. Maintain kitchen organization with a simple routine—one in, one out. The result is calmer counters, faster meal prep, and a welcoming, belonging-filled space you’re proud to share. Regular maintenance, including reviewing NSF-certified equipment considerations during upgrades, helps ensure long-term reliability and safety.
Cosmetic Details That Truly Refresh a Kitchen
After loosening clutter, the next step is to refresh the space with smart cosmetic updates that pay off every day. You’ll find small changes deliver big mood, so pick achievable tweaks you can enjoy daily. Focus on budget lighting and cabinet hardware to instantly elevate perception and function.
- Swap outdated fixtures for simple, bright LEDs and under-cabinet lighting to brighten work zones
- Replace knobs and pulls with cohesive cabinet hardware that mirrors your style
- Add a reflective backsplash edge or glass accents to bounce light and feel bigger
- Use removable organizers and tasteful decor accents to refine the overall look without clutter
These updates are affordable, practical, and inviting, helping you feel connected to a kitchen that truly belongs to you.
Maintenance Hacks to Make Your Upgrades Last
Ever wondered how to keep your fresh kitchen upgrades looking sharp for years? You’ll set simple routines that protect value without drama. Build a quick maintenance calendar based on budget planning, so tasks stay predictable and affordable. Wipe down surfaces with a microfiber cloth and mild cleaner after heavy cooking to prevent stains on surface materials. Seal, oil, or wax wooden accents as recommended, and reapply when tone shifts. Inspect hinges, tracks, and screws monthly; tighten or lubricate as needed to avoid squeaks and misalignment. Use spill mats under small appliances to limit damage and protect countertops. Replace cheap caulk with durable options before wear shows. Plan seasonal checks, and track costs to preserve upgrades without overspending.
Frequently Asked Questions
How Do I Prioritize Upgrades for Maximum Impact on Resale Value?
To prioritize upgrades for maximum impact on resale, start with high-visibility fixes: cabinet face updates, solid countertops, and modern hardware, since these are key to maximizing resale. Invest in durable materials where you’ll use the most, balancing cost of cheap upgrades with lasting appeal. Plan around durability concerns, selecting reliable appliances and fixtures. Focus on cohesive style and timeless finishes, and document costs to show value, helping buyers feel you prioritized smart, cost-effective upgrades.
Can I DIY Smart Home Features Without Electrical Rewiring?
Yes, you can DIY smart home features without rewiring. Start with DIY smart plugs and wireless lighting to add automation quickly. Think of it like a modern streetlamp in your living space—simple, shared, accessible. You’ll save money, feel empowered, and fit in with neighbors who value easy upgrades. Plan around your routines, keep cords organized, and choose devices that work with your ecosystem. Tap into voice control and schedules for seamless daily automation.
What Are the Hidden Costs Behind “Cheap” Kitchen Upgrades?
Hidden costs behind cheap upgrades often surprise you: wiring, permits, delivery fees, and hidden labor. You might save upfront, but you’ll pay later in reliability, energy bills, and maintenance. Budget for compatible parts, insulation gaps, and cool-down time for electrical checks. Expect warranty limits to shrink with cheap components. Plan smart by comparing total costs, not just sticker price, and prioritize quality fixes you’ll actually rely on daily. You’ll feel wiser, more secure, and like you truly belong.
How Long Do Affordable Upgrades Typically Last Before Replacement?
How long do affordable upgrades last? It varies, but you can expect several years with proper care. Budget-friendly choices like laminate countertops or vinyl flooring often hold up 5–10 years, while solid mismatches may stretch longer with maintenance. You’ll maximize lifespan by sealing, cleaning regularly, and avoiding moisture. Plan for mid-term refreshes, not perfection. Are you ready to invest smartly now so these affordable upgrades serve your kitchen’s heart and your sense of belonging?
Which Sustainable Materials Balance Cost and Durability Best?
You should choose wood alternatives or recycled composites for a balance of cost and durability. They resist wear while staying affordable. Pair them with smart coatings and eco friendly paints to extend life and reduce maintenance. Consider durable finishes, low-VOC options, and easy repair routines. This keeps your kitchen cohesive, inviting, and sustainable, so you feel you belong, supported by practical choices that locals trust and recommend.