You can get durable, stylish kitchen countertops on a shoestring by sourcing upcycled materials locally and planning smart. Start with a clear budget, then pick low-cost, durable underlayment and sealants that fit moisture needs. Consider repurposed wood, salvaged stone, or recycled laminates, and seal for longevity. Plan edges and supports, keep maintenance simple, and track costs in a ledger. With practical sourcing and a phased plan, you’ll maximize value—and there’s more to learn as you proceed.
Key Takeaways
- Define upcycled countertops by function, durability, and salvaged source to extend life, fit space, and stay affordable.
- Prioritize budget planning: set a clear upfront budget, track costs, and focus on core daily-use surfaces first.
- Use cost-effective underlayment (plywood, HDF, or cement board) matched to moisture and subfloor; plan precise cuts to reduce waste.
- Choose durable, repair-friendly upcycled materials (reclaimed wood, salvaged stone, repurposed laminates) with simple sealant routines.
- Implement a seal-and-maintenance plan (annual to biennial seals, quick fixes for chips) to maximize longevity on a shoestring.
What Counts as Upcycled for Kitchen Countertops
What counts as upcycled for kitchen countertops? You’ll define it by function, durability, and source, not by glamour. You’re aiming for materials that extend life, reduce waste, and fit your space without breaking the bank. Think repurposed wood, salvaged stone, or reclaimed metal, plus well-sealed laminates rescued from disposal. It’s not about trendy label marketing; it’s about practical reuse that stands up to daily prep. Beware upcycled myths that promise instant perfection; countertop myths often gloss over sealing, maintenance, or compatibility with your cabinet height. Do your homework: verify structural integrity, moisture resistance, and finish compatibility. Choose options you can repair, source locally, and feel good about sharing with neighbors. Your belonging grows as you make thoughtful, affordable, eco-friendly choices.
Define Your Budget for Upcycled Countertops
Set a clear spending limit before you start, so you don’t waste time chasing deals you don’t need. Prioritize core projects—like surfaces you’ll actually use daily—over flashy features that won’t add value. With these guides, you’ll stay practical and stay on budget as you plan your upcycled countertop. gooseneck spout
Set Your Spending Limit
Setting a clear budget upfront keeps your upcycled countertops practical and affordable. You’ll set a spending limit that respects your space, needs, and time, then design around it. First, define rough costs for materials, tools, and any professional help you might require. This keeps upcycled pricing realistic and prevents sticker shock. Next, map your budget to priorities: durability, look, and installation ease. If you face budget constraints, consider scalable options—start small with a sample or partial wrap, then expand later. Track every purchase in a simple ledger, so you see where savings come from and where you may cut back. Stay flexible, seek affordable waste-reducing sources, and celebrate mindful progress as you transform your kitchen without overspending.
Prioritize Core Projects
Prioritize the core projects with a clear, tight budget you can actually follow. You’ll define what matters most and avoid overloading your plan. Start by listing essential upgrades that deliver the most visible impact, then map costs against a realistic timeline. Allocate funds for materials, tools, and a safety margin, and keep a single, simple budget tracker you can update weekly. Stay disciplined: resist splurges on trendy finishes that don’t improve usability or durability. Prioritizing core projects reduces waste and speeds your progress, so you feel part of a practical community rather than isolated in a DIY swirl. Remember upcycling ethics—choose recycled or salvaged components when possible—and log every expense to reinforce responsible choices and budget tracking. You’ll finish stronger, with clarity and belonging threaded through every decision.
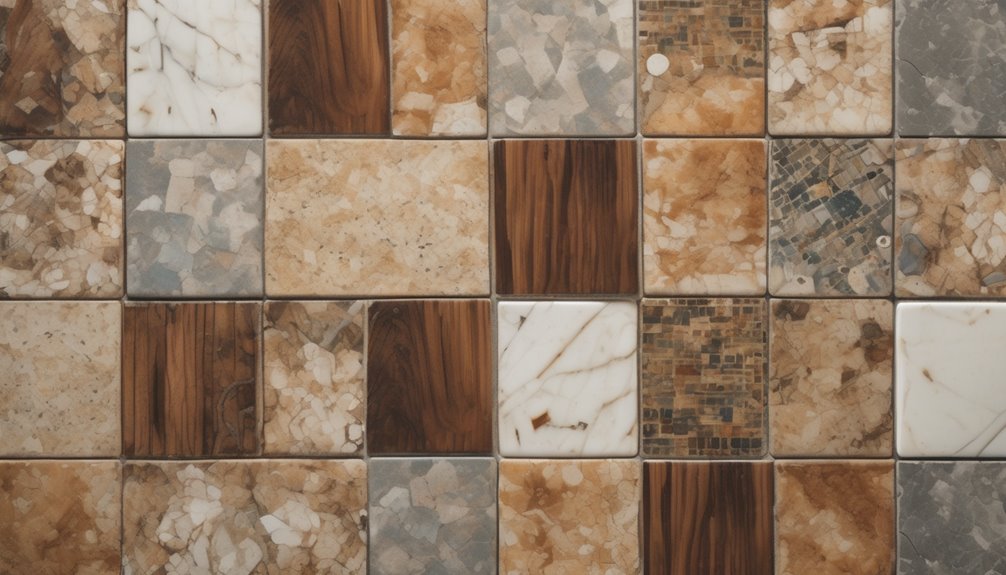
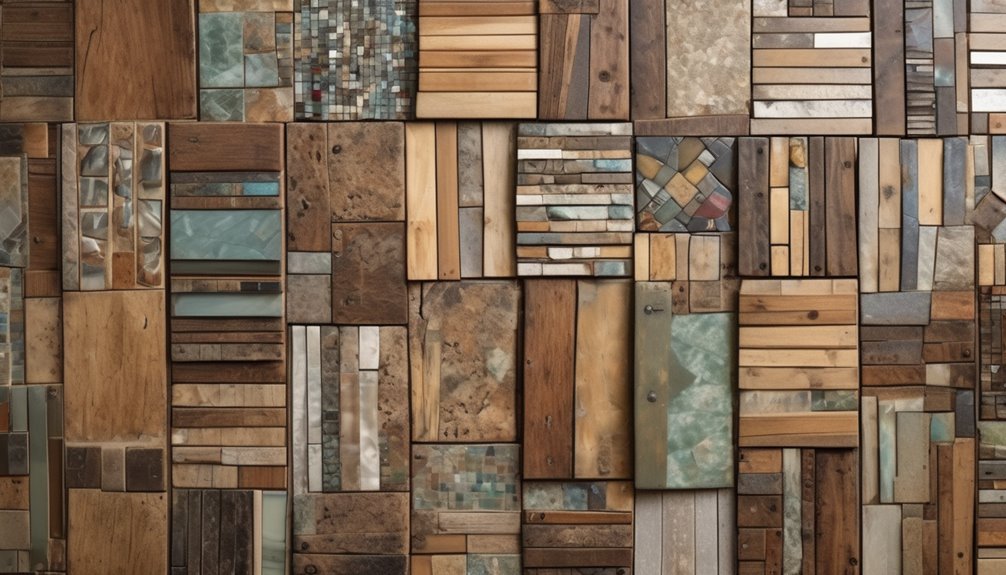
Upcycled Materials for Countertops: What Works and Why
What kinds of upcycled materials actually work for countertops, and why do they make sense on a tight budget? You’ll find durable options that balance practicality with value, so you stop overbuying. Recycled glass, concrete with mixed aggregates, and butcher-block composites can deliver solid performance if you prep surfaces and seal them well. Old linoleum tiles or vinyl composite laminates offer surprising resilience when layered with clear sealant and appropriate edging. Paper-based countertops, if treated with durable resins, can be surprisingly sturdy in low-traffic areas. The key is choosing materials with clear repair paths and commodity parts for easy maintenance. This approach supports upcycled durability and budget feasibility, helping you build a cohesive kitchen that feels like belonging, not compromise. Pulse-control insights from practical kitchen equipment choices also remind us that durable, adjustable sealing methods can parallel how we age-proof surfaces and edges for long-term use.
Step-by-Step Plan for an Upcycled Countertop Project
You’ve got a solid base from upcycled options, so now it’s time to map out a practical, budget-friendly plan to actually build your countertop. Begin with a clear scope: measure, cut, and assemble using reliable upcycled materials, then decide on coating choices that suit cooking, cleaning, and aesthetics. Check supplier sourcing for affordable, durable options, and confirm disposal considerations align with local rules. Consider flooring compatibility tips to avoid height mismatches and trip hazards. Address ventilation requirements in your workspace to prevent fumes. Outline waste reduction strategies, like sorting scrap for future projects, and estimate waste hauling costs. Review insurance implications and municipal permits early. Be mindful of noise concerns and potential landfill impact to keep your project community-friendly and resale-worthy. For planning efficiency, implement a clear workflow that mirrors the disciplined setup and quiet operation principles found in adjustable-height desk designs, so your project remains organized and unobtrusive throughout the build. planning efficiency
Choose Underlayment and Seal: A Practical Plan
First, check your subfloor compatibility to avoid later fixes, then pick a cost-effective underlayment that suits your space and moisture needs. Consider material options that pair well with your countertop goals while staying within budget, and map out a sealant plan that maximizes longevity. This approach keeps your project practical, clear, and ready to withstand daily kitchen use. Durable steel frame ensures lasting support for a compact workspace, and keeping cable management tidy helps maintain a clean, organized surface embedded cable routing and overall workflow.
Subfloor Compatibility Tips
Choosing the right underlayment and sealant for your subfloor is a smart move when you’re upcycling kitchen countertops on a budget, since it protects against moisture, reduces bounce, and extends longevity without breaking the bank. You’ll prioritize subfloor compatibility with affordable options like cardstock-grade plywood or cement board where appropriate, ensuring fast installs and sturdy support. Verify the subfloor is clean, level, and dry before laying anything down, because a solid base keeps your countertop look seamless. For moisture mitigation, seal seams and edges where water could seep, and choose a breathable, compatible sealant that won’t trap moisture. This practical plan keeps installation simple, reduces future repairs, and helps your home crew feel like a tight-knit team. Additionally, selecting materials with durable construction and reliable lift performance can inform downstream decisions about how the countertop system will hold up under daily use and adjustments, echoing the emphasis on stability and long-term reliability found in well-built furnishings like HUANUO desks long-term reliability.
Material Underlayment Choices
What underlayment makes the most sense when you’re upcycling countertops on a budget? You’ll want something affordable, durable, and easy to install. Prioritize compatibility with your subfloor and countertop material, plus moisture control. Here are solid options to consider:
- Plywood panels with a thin adhesive layer for rigidity
- High-density fiberboard (HDF) for a smooth, uniform surface
- Cement board for moisture resistance in wet areas
Keep budget considerations in mind: source reclaimed or discounted sheets, measure precisely, and plan for minimal waste. Remember that proper underlayment reduces squeaks, spreads load evenly, and improves edge stability. Your goal is a trustworthy base that supports long-term use without breaking the bank. By choosing the right underlayment, you’ll feel confident and connected to the project—and your kitchen. upcycled underlayment matters in practice.
Sealant and Longevity Plan
You’ve chosen a budget-friendly underlayment, now it’s time to pair it with a solid sealant plan that protects your upcycled countertop over time. Start with a breathable, moisture-friendly sealant to minimize trapped humidity. Look for food-safe options if you cook nearby and choose a film-forming finish for easy wipe-downs. Apply thin, even coats, following manufacturer guidance to avoid puddling or bubbles. Allow full cure between layers, and seal edges where water ingress is most likely. For longevity, schedule a refresh every 1–3 years depending on usage, and match the sealant longevity to your lifestyle. Address epoxy concerns by avoiding incompatible cleaners, and test a small area first. With care, you’ll feel a shared pride in a durable, cost-conscious surface. Regular maintenance supports long-term comfort and stability, much like the dependable features found in ergonomic design. breathable sealant
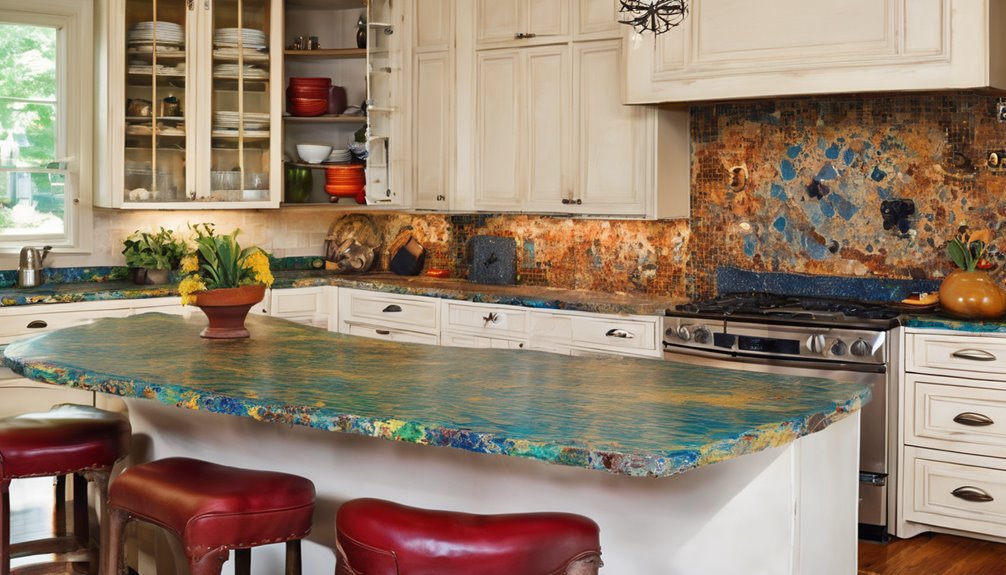
Budget-Friendly Upcycling Ideas That Deliver Results
Looking to stretch your dollars without sacrificing style? You’re not alone, and these budget-friendly upcycling ideas deliver real results. You’ll feel part of a community that values clever choices over costly solves. Plan first, then act, focusing on approachable projects with honest sourcing.
- Quick laminate overlays using inexpensive sheets and self-adhesive backing
- Reclaimed countertop panels sealed with a DIY, food-safe finish
- Refreshed edges with painter’s tape, hobbyist paints, and clear sealant for a cohesive look
Smart budgeting means mindful material sourcing and avoiding budgeting pitfalls—don’t overspend on tools you won’t reuse. Keep expectations grounded, test small sections, and scale up as you gain confidence. Your kitchen gains character, and your budget breathes easier when practicality leads the way.
Tools, Safety, and Time: What You Need to Know
If you’re tackling upcycled countertops on a budget, you’ll want to map out the tools, safety steps, and time you’ll invest up front. You’ll stay practical by listing basics, wearing PPE, and setting realistic milestones to avoid budget overruns. Be aware of upcycling myths that tempt corner-cutting, and flag budget pitfalls like mislabeled materials or hidden prep costs. A simple toolkit and a clear schedule keep you confident and included in the process.
| Tools | Safety/Prep |
|---|---|
| Tape measure, saw, sander | Gloves, goggles, dust mask |
| Time estimate | Finishing steps |
| 6–12 hours | Sealing, curing, cleanup |
Edges, Profiles, and Aesthetics on a Budget
Guessing what looks good on a budget can feel like a puzzle, but smart choices for edges, profiles, and overall aesthetics will stretch your dollars without sacrificing style. You’ll keep the project cohesive by picking simple edge details and clean profiles that complement your upcycled surface. Focus on materials, finishes, and the right proportion to avoid visual clutter. Ergonomic Design supports long-term comfort and cohesive design when selecting edge and profile details for a durable kitchen counter.
Maintenance and Real-World Costs: Keeping It Long-Lasting
A well‑built upcycled countertop pays off in real savings only when you keep it maintained and budget-friendly to repair. You’ll want a routine: wipe daily, seal every year or two, and address chips or cracks before they spread. Use inexpensive, elbow-grease fixes first, like touch‑ups with resin or epoxy, then plan low‑cost replacements only when needed. Real costs come from coatings, sealants, and occasional fasteners, so track a simple maintenance fund—a small monthly amount beats surprise bills. With care, you’ll enjoy upscale luxury vibes without the price tag, because longevity cuts waste. Prioritize durability over trends, and practice full optimization: reusable materials, modular patches, and easy DIY repairs. Belonging grows when your kitchen stays functional, affordable, and ready for guests maintenance routines are essential.
Frequently Asked Questions
How Long Does an Upcycled Countertop Project Typically Take?
It typically takes weeks, not days, depending on you, your DIY crew, and the weather gods. You’ll plan, prep, and paint, then install, seal, and test—with a few patience-induced sighs along the way. Expect longer installation if you’re chasing perfect edges or sourcing odd scraps. Hidden costs pop up when you switch materials or hardware. Stay practical and budget-conscious, and you’ll feel you belong in this crafty club, even when the countertop drama unfolds.
Can I Install Upcycled Countertops Myself Without a Pro?
Yes, you can install upcycled countertops yourself. Start with DIY install tips like measuring precisely, matching edge profiles, and securing with proper fasteners. Budget friendly planning means reuse materials wisely, prep surfaces, and seal seams well. Expect to rent tools only if needed, and follow local codes. You’ll save money, gain confidence, and belong to a community of hands-on builders. Take it slow, double-check levels, and enjoy the tangible, affordable results.
What Hidden Costs Should I Anticipate Beyond Materials?
Installation challenges and unforeseen maintenance are real beyond materials. When you plan,预算 for extra tools, fasteners, and possibly edge treatments, plus potential reseals over time. I once watched a DIYer learn that a crooked sink cut costs more than a pro’s initial estimate, so you’ll want space for adjustments and upgrades. Expect grout or sealant upkeep, soft spots, and occasional countertop releveling. Budget-conscious choices help you feel you belong, not isolated, while tackling surprises.
How Durable Are Upcycled Countertops Compared to Quartz or Granite?
You’ll find that durability varies, but upcycled countertops aren’t as hard as quartz or granite. They can be surprisingly sturdy if you seal, maintain, and avoid heavy impacts; expect more maintenance compared to engineered surfaces. In a durability comparison, you’ll trade some scratch resistance for character and budget savings. For shard-free longevity, prioritize proper sealing and routine upkeep. Acknowledge maintenance considerations, and you’ll feel you belong in a practical, affordable, DIY-minded community.
Are There Any Warranty or Durability Guarantees With Upcycled Options?
Ever wonder if you’ll get warranty peace of mind with an upcycled option? Yes—some suppliers offer limited warranties and lifespan guarantees on upcycled finishes. You’ll want written coverage for wear, cracking, and staining, plus care instructions. Look for an upcycled finish that’s rated for kitchen use, and ask about replacement terms. Budget-friendly choices can still feel supported; choose products with clear guarantees so your kitchen belongs to you, not your doubts.