Start by pinpointing clutter zones through a quick walk and map shelves by use—daily staples, snacks, bulk buys, catch-alls—then build a practical, scalable plan you can share and grow. Set a budget for nonnegotiables like bins, labels, and shelves, cap discretionary buys, and track storage metrics. Reclaim cabinet space with stacking, risers, and uniform containers. Add vertical wall storage for daily essentials, and pick multi-use tools. Finish with flexible drawers and a monthly reassessment; more tips await.
Key Takeaways
- Conduct a quick walk to identify clutter hotspots by function and usage, then map shelves for daily staples, snacks, bulk buys, and catch-all items.
- Set nonnegotiables (bins, shelves, labels) and cap discretionary purchases to prevent creeping clutter.
- Reclaim cabinet space with uniform containers, risers, and labeled tiers to maximize volume and reduce wobble.
- Use vertical wall storage for daily essentials, placing frequently used tools at eye level to cut counter clutter.
- Prioritize multi-use tools and versatile storage that nest, stack, or fold, plus regular weekly use assessments to stay lean.
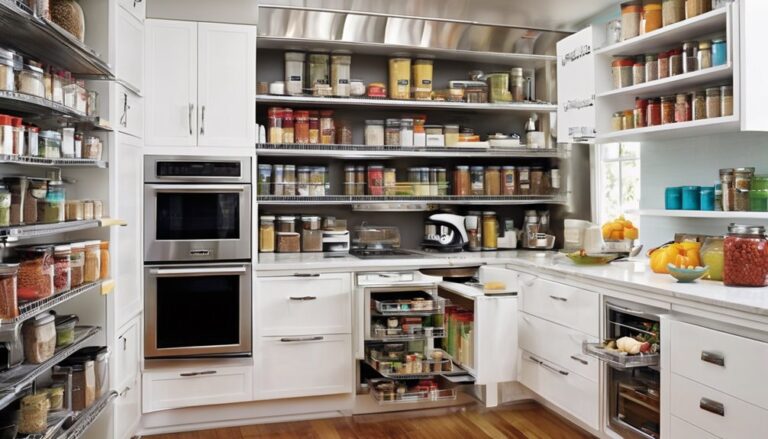
Pinpoint Your Kitchen Clutter Zones (Then Build a Plan)
Pinpointing your kitchen clutter zones is the first step to a smarter, more organized pantry. You’ll gain clarity by mapping where items actually live, not where you wish they stayed. Begin with a quick walk: note frequent returns, shelves overloaded with duplicates, and underused corners. This is clutter zoning in action—the process of assigning zones by function and frequency. Next, create a simple plan mapping that mirrors real use: zone for daily staples, zone for snacks, zone for bulk buys, and a catch‑all spot for odds and ends. Keep the layout practical, accessible, and scalable so others feel welcome to help. With a clear map, you’ll reduce rummaging, save time, and build confidence in your space. Your plan grows with you. Two-piece desktop
Set a Realistic Budget for Storage and Sorting
Now that you’ve mapped your clutter zones, it’s time to set a realistic budget for storage and sorting. You’ll approach this with clear budget planning, aligning costs with your priorities and the space you’ve mapped. Start by defining nonnegotiables (bins, shelves, labels) and cap discretionary purchases to avoid creeping clutter. Track storage metrics: item counts, turnover, and usage frequency, then translate these numbers into monthly costs. Prefer durable, versatile solutions over fads, and choose modular options that scale as you refine zones. Set a timetable for upgrades—prioritize high-return investments first. Keep receipts and compare against your plan weekly. This disciplined approach helps you belong to a organized kitchen community that values purpose, simplicity, and consistent progress. Long-term durability


Reclaim Cabinet Space With Smart Stacking
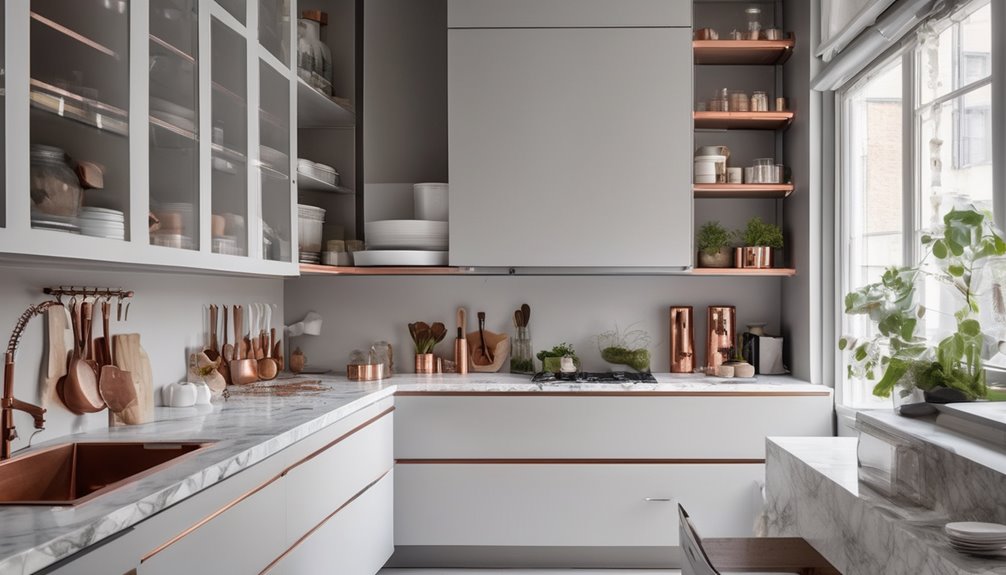
Ever wonder how much shelf space you’re truly wasting? You can reclaim cabinet space quickly with smart stacking. Treat your shelves like a grid: lighter items on top, heavier ones below, and uniform shapes aligned front-to-back. Use risers to create micro-shelves for canned goods or spice jars, boosting visibility and access. Stack with purpose—group related items, then label tiers so you know where everything lives. Clear, uniform containers maximize volume and reduce wobble, while lids stay with their jars to avoid searches. Rotate stock as you restock to keep freshness and planogram order. Practice stacking efficiency by testing arrangements before committing; small tweaks yield big gains. This approach builds confidence, saves time, and reinforces belonging in a well-organized kitchen. reclaim cabinet space starts here.
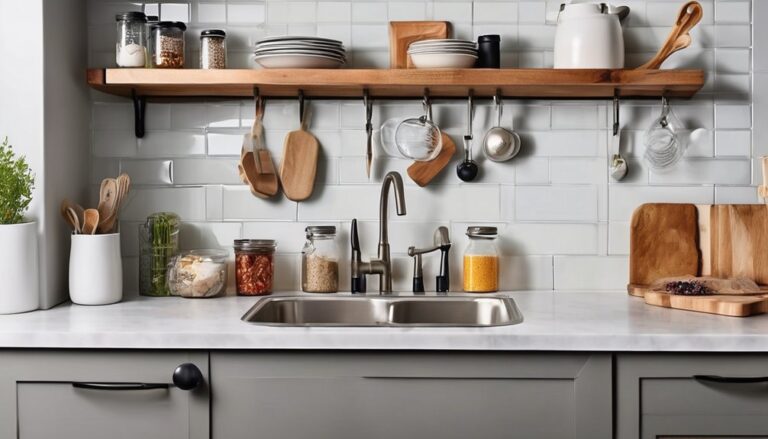
Use Vertical Wall Storage for Daily Essentials
Vertical wall storage keeps daily essential within reach and off counter clutter. Start with the basics: choose sturdy mounts, assign clear zones, and regularly rotate items to match your routines. For space-saving, place frequently used tools at eye level and lighter items higher, using simple mounting tips to maximize efficiency. Pairing wall storage with a tidy cable management mindset can further reduce clutter and improve usability cable management and stability during use.
Vertical Wall Storage Basics
Want to free up counter space fast? Vertical Wall Storage Basics set you up for efficient, accessible organization. You’ll start with a clear plan: identify daily essentials you reach for most, then map their spots on vertical storage and wall shelving. Choose sturdy mounts that support your weight and adjustability that fits tall cabinets or narrow walls. Install visually light shelves at reachable heights, and use labeled baskets for small items to reduce clutter. Keep frequently used items grouped together so you can grab and go. Use uniform containers to simplify stacking and cleaning. Regularly reassess as you add or remove items, ensuring the system stays intuitive. This approach creates belonging through order, reliability, and a kitchen that feels intentional and calm. Storage efficiency can further enhance daily routines by reinforcing a calm, organized workspace.
Daily Essentials Organization
Organize your daily essential on the wall to keep what you grab most within arm’s reach. You’ll create a practical station that supports minimal clutter and your budget friendly space optimization goals. Place items by daily routines: coffee, utensils, keys, and small adapters. Use labeled containers and hooks to reduce searching time, and rotate items seasonally to maintain order. This setup feels intentional and inclusive, inviting everyone to contribute to a tidy kitchen. The lightweight, modular approach echoes the idea of a stable, durable surface that supports daily tasks with long-term usability. ergonomic height considerations can guide where you place frequently used items for easier reach. This setup reinforces belonging: a shared, efficient space that respects routines and keeps essentials accessible.
Space-Saving Mounting Tips
Ever consider how much countertop clutter fades when you go vertical? You’ll gain instant organization by embracing space-saving mounting tips. Start with sturdy wall shelves positioned at eye level for daily essentials, freeing up drawer space without sacrificing accessibility. Use magnetic strips for knives and metal tools, keeping counters clear and your hand tools within reach. Install pegboards or slat walls to customize what you store, rotating items as routines change. Choose compact racks for spices, cups, or lids, and keep frequently used items mounted beside the prep zone. For liquids or fragile items, opt wall-mounted dispensers or hooks to prevent spills. These space saving ideas rely on smart mounting techniques to cultivate a calmer, more cohesive kitchen flow while maximizing storage efficiency.
Pick Multi-Use Kitchen Tools to Cut Clutter
Choose multi-use essentials that pair well to maximize efficiency and reduce duplicates. By prioritizing versatile options, you streamline what you keep and simplify your routine. Include tools like a blender that handles smoothies and sauces, or a grater that also functions as a zester multi-use functionality to further cut clutter without sacrificing capability.
Multi-Use Essentials
Smart, multi-use tools save space and slash clutter by replacing single-purpose gadgets. You’ll streamline drawers by choosing versatile essential s that perform double duty—think a sturdy chef’s knife with built-in paring edge, a grater that doubles as zester, and a saucepan that doubles as a steamer insert. When you shop, embrace minimalist habits: evaluate what you actually use weekly, then select tools that cover multiple tasks. This keeps your kit lean without sacrificing capability. Your budget-conscious approach should prioritize quality over quantity, enabling fewer purchases with better longevity. Focus on compact, stackable designs and easy-clean surfaces. By favoring multi-use pieces, you create a cohesive setup that feels intentional and welcoming—a kitchen that supports belonging, efficiency, and confident cooking every day. SGS-tested base; 300 lbs
Maximize Tool Pairings
Are you getting the most out of every tool in your kitchen? When you pick multi-use items, you unlock storage pairing and enhance tool synergy. Choose core pieces that handle multiple tasks—think a sturdy chef’s knife, a mixing bowl with a lid, and a versatile spatula—so you reduce clutter and keep essentials close at hand. Pair tools by function and storage spot to maximize flow and minimize searching. The result is a calmer workspace and quicker meals, not excess gear. A well-chosen multi-use setup can support ergonomic efficiency and reduce movement, which contributes to a more comfortable cooking routine. This approach builds belonging through practical, coordinated choices. Durable materials help ensure lasting performance across tasks.
| Dual-use companion | Primary task |
|---|---|
| Chef’s knife with paring blade | Slicing, peeling, precision cuts |
| Silicone spatula and spoon set | Stir-fry, scraping, folding |
Declutter With Versatility
If you want to cut clutter effectively, start with multi-use tools that handle several tasks in one go. When you choose one tool, you cut redundant gadgets and simplify your prep routine, which strengthens your declutter strategy. Opt for versatile storage that nests, folds, or stacks, so your drawers stay calm and accessible. Prioritize tools that perform at least three functions, like chopping, measuring, and slicing, or mixing and blending. This versatility minimizes duplicates and frees cabinet space for essentials you actually use. Build a small, reliable set and store it where it’s easy to reach. Your kitchen should feel welcoming, not crowded, so choose items that prove their worth daily and reinforce a sense of belonging. Consistency is your best decluttering ally.
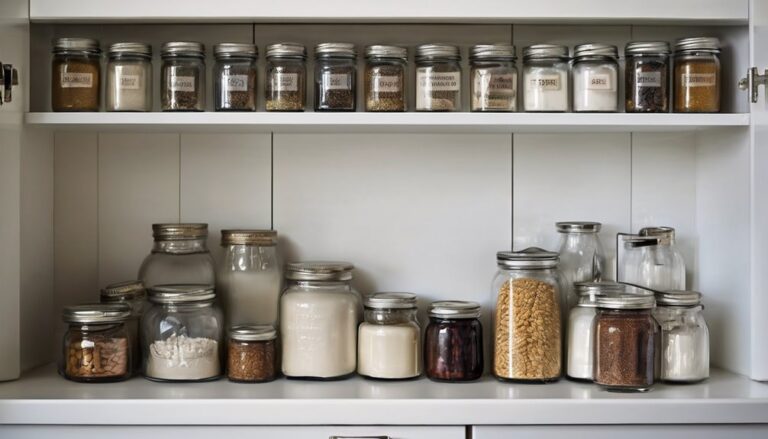
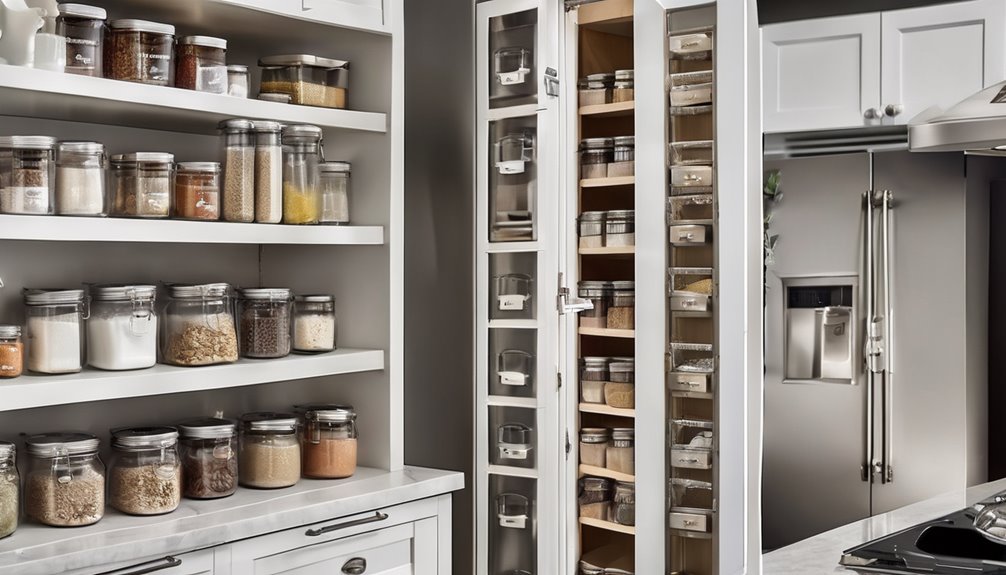
Use Clear, Uniform Containers for Easy Visibility
Using clear, uniform containers makes it easy to see what you’ve got at a glance and prevents food from hiding in opaque bags or mismatched jars. When you replace messy packaging, you gain quick access and reduce rummaging. Choose airtight lids and a consistent size system so you can stack, label, and rotate with confidence. Clear visibility helps you plan meals, track freshness, and minimize waste, which keeps your kitchen calm and efficient. Opt for uniform containers that fit your shelves and drawers, not just the prettiest option. Label contents and dates in a legible, durable way. With this approach, you’ll feel enabled, organized, and part of a mindful, practical cooking routine that respects shared spaces. Higher suction and durable sealing features from external vacuum sealers can further boost freshness by removing air efficiently in bulk storage air removal efficiency and help keep bulky items primed for meal prep.
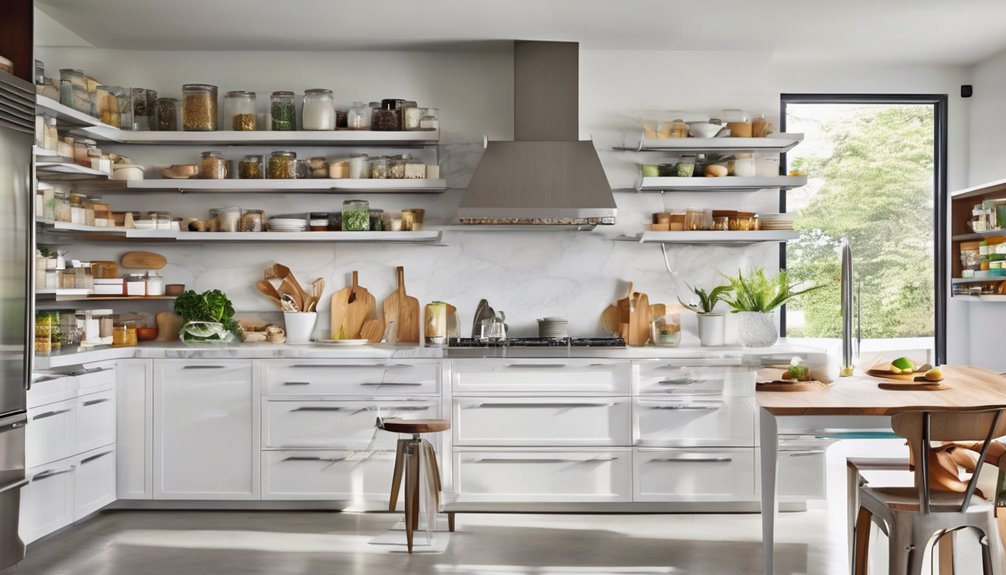
Create Prep, Cook, and Clean Zones for Smooth Flow
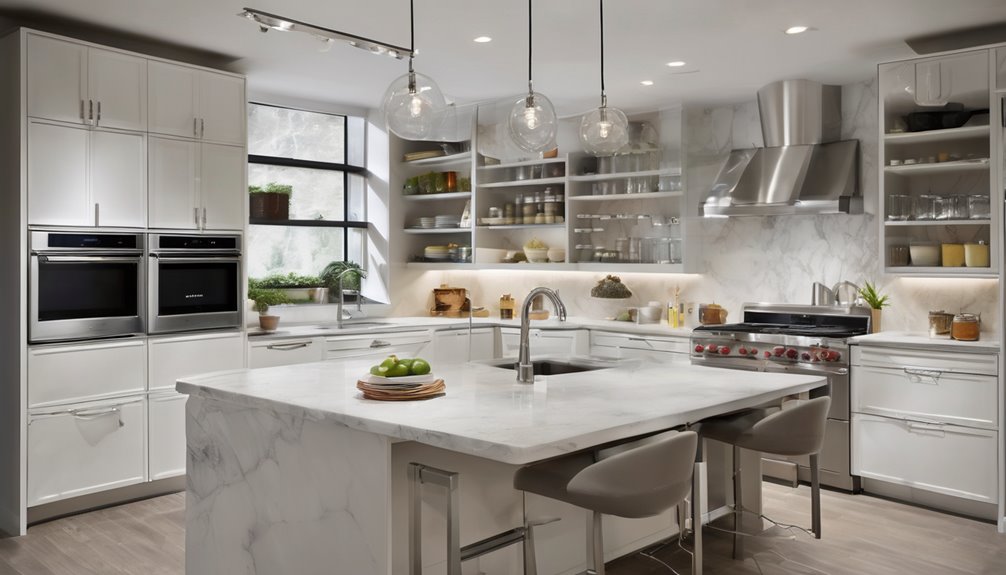
After organizing with clear, uniform containers, set up distinct prep, cook, and clean zones to keep workflow smooth. You design prep zones near the sink and counter space you actually use, so washing, chopping, and measuring stay efficient. Move cook zones near the stove or heat source, with easy access to pans, utensils, and hot pads. A dedicated clean zone should sit away from raw ingredients, featuring trash, towels, and a small compost bin for quick sanitizing. Keep zone boundaries obvious with labeling or color cues, and maintain a simple rhythm: prep, cook, clean, repeat. This structure minimizes cross‑traffic and hesitation, helping everyone feel confident and included in the kitchen routine. By design, you’ll save steps and time.
Install Flexible Drawer Dividers and Clear Labels
Consider this: flexible drawer dividers and clear labels streamline every drawer, letting you see exactly what’s inside and access it in one motion. You’ll install flexible dividers and clear labels to create order you can trust, eliminating chaos and wasted time. Once set, your drawers become intuitive tools, not puzzles. Use consistent labeling for quick recognition and maintenance.
- Fit the right-width dividers for each drawer
- Label categories clearly, with shared terminology
- Keep labels at eye level for instant reading
- Group like items to reduce rummaging
- Recheck periodically and adjust as needs change
Swap to Budget-Smart, Space-Saving Gear
Ever wonder how to keep your kitchen budget tight without sacrificing space? You’ll swap to budget-smart, space-saving gear that actually fits your routines. Look for modular containers that stack neatly and labeling that stays legible, so you know what you have at a glance. Choose compact appliances with multi-use functions to reduce clutter and energy use. Prioritize items that perform two tasks, like a blender that doubles as a food processor, or a magnetic knife strip to free counter space. Avoid trendy oversized gadgets; opt for essentials you’ll use weekly. Invest in quality, compact organizers for drawers and cabinets, and use vertical storage where possible. With budget-smart choices, you’ll maximize storage while keeping a cohesive, welcoming kitchen you’re proud to share. budget smart, space saving.
Maintain Momentum With a Monthly Detox and Reassess
Set up a monthly detox rhythm that you actually follow, so you stay aligned with your storage goals. Use a quick reassess and reset every month to prune what’s left unused, expired, or redundant. When you finish, adjust your plan and reinforce the habits that kept your kitchen space clear and functional.
Monthly Detox Rhythm
A monthly detox rhythm keeps your kitchen momentum strong: set a simple cadence to reassess what’s working and what isn’t, then adjust your storage, routines, and tools accordingly.
- budget friendly tweaks that compound over time
- storage hacks that reclaim shelf space and accessibility
- a clear cadence for review, not overhaul
- simple metrics to measure what actually saves you time
- a sense of belonging through shared, practical routines
This approach stays practical and concise, guiding you to lean into what matters: fewer decisions, faster actions, and more confidence in your choices. With a monthly detox, you protect momentum, minimize clutter, and keep your kitchen aligned with your goals. You’ll feel capable, included, and on track to sustain a clutter-free, efficient space.
Reassess And Reset
Ready to keep momentum steady? Reassess and reset this month to lock in progress without burnout. You’ll reassess goals, then reset priorities, so every action serves your budget and space. This isn’t a reset from scratch—it’s a refine, keeping you grounded in belonging to a practical routine. Use a quick monthly detox check: what’s still essential, what’s not, and what’s inspiring. Below is a snapshot to guide your focus.
| Item | Action |
|---|---|
| Pantry basics | Keep only staples you actually use weekly |
| Tools | Return or retire unused gadgets |
| Containers | label, stack, and optimize for visibility |
| Groceries | plan meals, avoid impulse buys |
| Space | reallocate for accessibility |
Reassess goals, reset priorities, and maintain momentum with confidence.
Frequently Asked Questions
How Do I Measure My Cabinet Dimensions Accurately?
A cabinet is a treasure chest—you’ll unlock it with precise measurements. To measure accurately, you start with measuring depth, cabinet height, door clearance, and countertop overhang. Use a steel tape, keep it level, and note each dimension on the same wall. Double-check gaps and account for handles. Write down results in inches, then compare to your doors and shelves to avoid interference. You’ll feel confident: your space will finally fit you.
What’s a Realistic Monthly Storage Budget for a Family?
A realistic monthly storage budget for a family depends on your space and goals, but plan around 5–10% of your monthly income as a starting point. You’ll want to balance essentials with decluttering upgrades, storage containers, and organization tools. Factor monthly_budget for storage into your family_enviroment considerations, ensuring it supports a calm, collaborative home. Stay practical, monitor expenses, and adjust as needed so your budget fosters belonging, efficiency, and easier living for everyone.
Can I Repurpose Existing Items to Save Space?
Did you know 40% of household clutter is items we could repurpose or donate? Yes—you can repurpose existing items to save space. Start with recycling ideas like turning jars into storage bins and reusing containers for bulk staples. Gather repurposing tools, then prioritize high-use zones. This practical approach helps you declutter faster and feel you belong in a more organized home, without extra purchases or waste.
How Often Should I Re-Evaluate My Kitchen Layout?
You should re-evaluate your kitchen layout every 6 to 12 months. This cadence keeps you aligned with changing routines and equipment needs. In practice, schedule a quick layout review after major tasks—holiday cooking bursts, new appliances, or family shifts. By maintaining a steady layout review cadence, you’ll spot bottlenecks fast and stay organized. You’ll feel a sense of belonging as parts fit your life, not the other way around.
Which Items Are Essential in a Minimalist Kitchen Toolkit?
Tiny gears click into place: your essential tools are simple, reliable, and fit a minimalist kitchen toolkit. You’ll want core appliances like a quality chef’s knife, cutting board, skillet, saucepan, measuring cups, and a dependable can opener. Add essential tools: peeler, tongs, spatula, whisk, and a compact grater. Storage optimization keeps things accessible, while a budget friendly setup proves you belong here, cooking confidently with practical, durable, budget-conscious choices.