Start with a clear, eco-friendly game plan: set a thrifted budget, define concrete energy-saving goals, and reuse what you already own. Hunt for compact, energy-efficient thrifted gear, prioritize LEDs, smart strips, and insulation, and swap jars and baskets into a practical upcycled pantry. Upgrade storage with adjustable, space-saving solutions, lean on DIY paint and repurposed cabinets, and seal drafts. Track spend and savings openly—community tips welcome. If you keep going, you’ll uncover more actionable steps and examples.
Key Takeaways
- Start with a clear thrift-first plan: set energy goals, a daily thrift target, and reuse existing items to reduce waste.
- Prioritize essential upgrades: filters, storage, and energy-efficient lighting to cut energy use and boost function.
- Use thrifted, compact gear (LED lighting, smart power strips, insulation) with durable, repairable designs.
- Master upcycled pantry and storage: jars, crates, shelves, labeling, and space-saving arrangements.
- Track budget and savings quarterly, inviting community deals and ideas to stay on target.
How to Plan a 30-Day Thrifted Kitchen Makeover on a Tight Budget
Planning a 30-day thrifted kitchen makeover on a tight budget starts with a clear, eco-friendly game plan: map out goals, set a daily thrift target, and commit to reusing what you already have whenever possible. You’ll harness thrifted budgeting by prioritizing items that truly elevate function and vibes, not just fill space. Start with essential upgrades—filters, cookware, storage—that save energy and reduce waste. Capture a simple shopping list, then scour local thrift stores, online marketplaces, and community swap events for compatible pieces. Treat reuse as a design tool: repurpose containers, refinish cabinets, and pair salvaged finds with fresh, low-cost accessories. Align choices with energy goals, selecting appliances and lighting that cut bills. This approach fosters belonging, responsibility, and a practical, shared path toward a refreshed, mindful kitchen. Energy-efficient choices can further guide you toward selecting items that reduce electricity use while staying within budget.
Set a Budget and Energy Goals for Your Kitchen Makeover
Set a realistic budget up front, so you know what you can spend without overreaching. Define energy-saving goals you can actually hit, like LED lighting or efficient appliances, and pair them with cost-friendly upgrades. Prioritize cost-effective measures that deliver noticeable impact, so your kitchen becomes greener without blowing your budget. Pair high-throughput cooking solutions with practical cleanup features to reduce daily energy waste and maintenance time high-volume throughput and keep your renovation efficient.
Set A Realistic Budget
Figuring out a realistic budget is the backbone of a smart kitchen makeover: it keeps you from overspending whereas guiding energy-focused decisions that pay off over time. You’ll map costs against your thrifted budgeting approach, prioritizing items that center reuse, repair, and local finds. Start with a simple line item: essentials, repairs, and upgrades that truly move the needle on energy use. Set a cap for new purchases, and tolerate trade-offs—secondhand cabinets, refurbished appliances, and energy-efficient lighting can stretch your dollars. Track every dollar with transparency, so friends and family feel invited to contribute or share deals. Align your plan with energy goals, but stay flexible as you discover better thrifted options. Community support reinforces belonging and keeps the process affordable Lumbar Support and Adjustments.
Define Energy-Saving Goals
Since you’re aiming for real savings, start by defining clear energy-saving goals alongside your budget. You’ll map where you spend energy now and what changes matter most, then set measurable targets you can actually hit. Think thrifted planning: choose appliances and fixtures that deliver steady efficiency without breaking the bank, and plan upgrades around seasons when you’ll use them most. Prioritize low-hanging wins—LEDs, smart strips, better insulation, and draft prevention—before fancier fixes. Write your goals as simple, concrete numbers that guide purchases and timing. Invite friends and family to join the journey, fostering a sense of belonging as you share progress. Keep goals visible, revisit quarterly, and adjust with honesty. Your thoughtful, practical approach turns energy saving into everyday, attainable routine. Pair these goals with a clear energy budgeting plan to ensure every purchase supports your overall efficiency targets.
Prioritize Cost-Effectiveness Measures
Before you pick a fancy upgrade, anchor your plan with a clear, realistic budget and concrete energy goals for the kitchen makeover.
You’ll thrive by using thrifted budgeting to stretch every dollar, while keeping energy goals front and center. Start with a modest budget, then prioritize high-impact, low-cost swaps like LED bulbs, weather stripping, and repurposed cabinetry. Match purchases to your energy targets, and track savings as you go, so you feel a sense of belonging with your greener home.
| Item or Rule | Estimated Cost | Energy Impact |
|---|---|---|
| LED lighting | $10–40 | Lowers electricity use |
| Weather stripping | $5–20 | Reduces drafts |
| Reused hardware | $0–15 | Cuts waste |
Find Thrifted Gear That Lowers Power Use and Fits Small Spaces
If you’re aiming to cut energy use without cramping your kitchen, start by scouting thrifted gear that’s efficient and compact. You’ll find thrifted lighting that also saves bills, from LEDs repurposed in vintage fixtures to low-watt bulbs tucked into pendant shades. Look for compact power bars with surge protection and USB ports, so you can run essential gadgets without clutter. Prioritize standards like ENERGY STAR when possible, but don’t overlook calibration: dimmable switches help you tailor light for meals and moods. Choose gear with metal or heat-dissipating housings to extend life in a busy kitchen. Keep usage simple: swap in thrifted lighting and compact power bars where feasible, and you’ll feel a shared, budget-smart belonging to a greener routine. Rotary-pump prosumer espresso machines offer steady pressure and reliable performance that can inspire thoughtful, low-energy beverage routines alongside your thrifted setup.
Smart Storage Hacks: Cheap Cabinet Upgrades You Can Do Fast
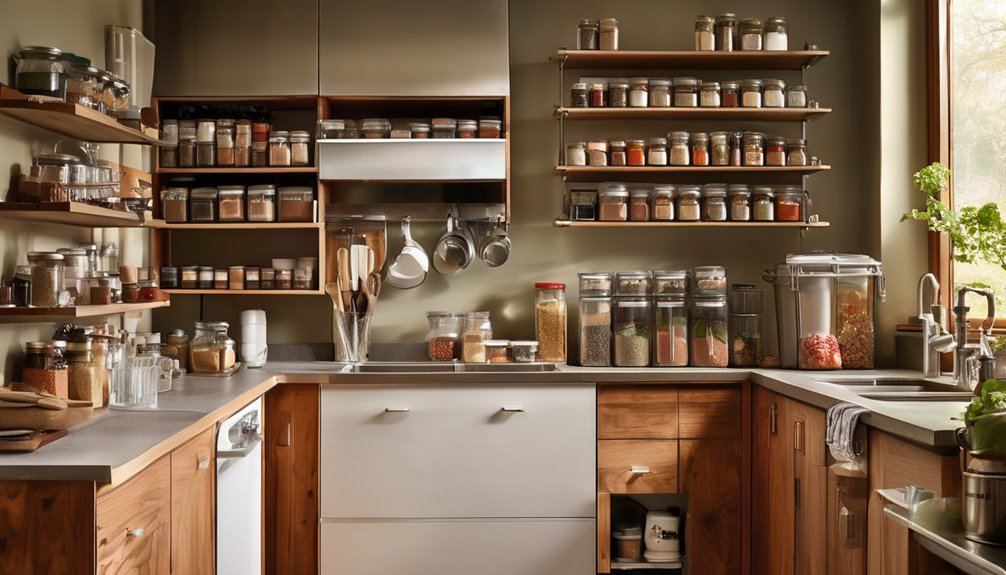
You don’t need a full remodel to gain better cabinet space: small, cheap upgrades can make a big difference fast. You can start with thrifted storage solutions that fit your existing shelves, like vintage baskets or wire dividers, to corral spices, lids, and utensils. Add adhesive shelf organizers to increase height for cups or plates without crowding. Repaint cabinet interiors in light, durable tones to brighten the space and feel larger, using low-VOC paint for eco-conscious choices. Adjustable racks that move with your needs, keeping essentials accessible and reducing rummaging, can adapt as your storage needs shift. This approach reuses what you already own, cutting waste and costs, and aligns with practical, durable design principles like those found in sturdy, adjustable desk frames that support long-term use. This approach builds belonging through practical, shared-sense improvements, making your kitchen friendlier and more efficient for everyone. Adjustable racks
Energy-Smart Appliances and Tools Worth the Investment
Are energy-smart appliances worth the investment when you’re upgrading a kitchen on a budget? Yes—you can bundle thrifted energy efficiency with smart budgeting for real savings and a shared sense of belonging. Focus on essentials that cut long-term costs, not just shiny features. Auto shut-off safety features from gooseneck kettles—such as boil-dry protection and reliable temperature control—can enhance consistency and reduce waste auto shut-off across daily routines. 1. Choose ENERGY STAR basics that fit your footprint and daily routines. 2. Prioritize compact sizes for thrifted energy and flexible layouts. 3. Compare annual operating costs to upfront price, guiding budget planning. 4. Favor durable, repairable brands to extend life and reduce waste.
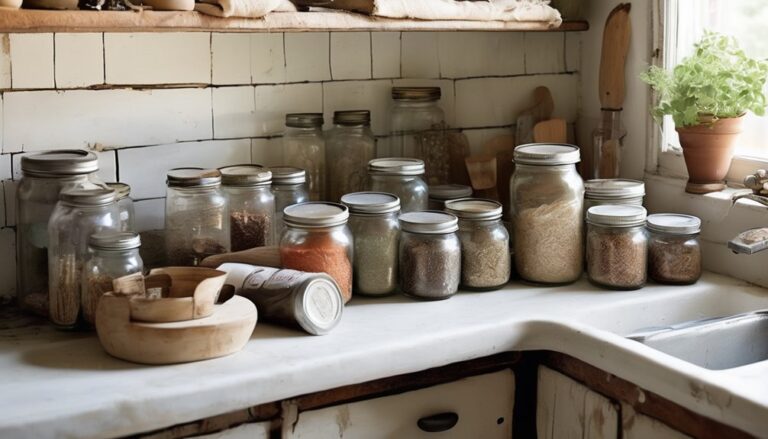
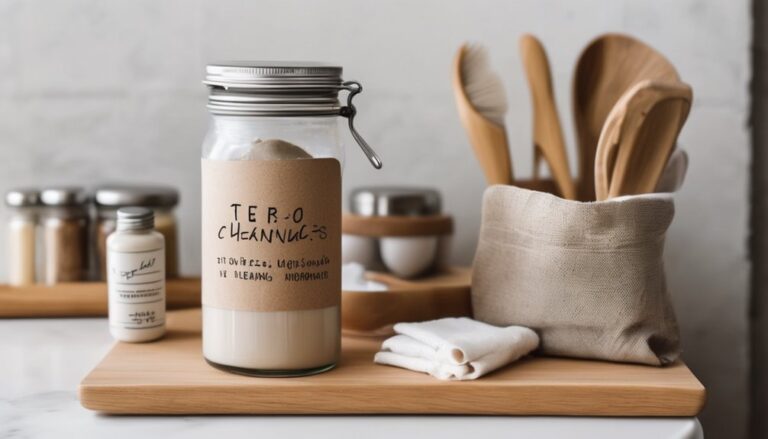
Upcycling Pantry Fixtures: From Junk to Practical, Space-Saving Items
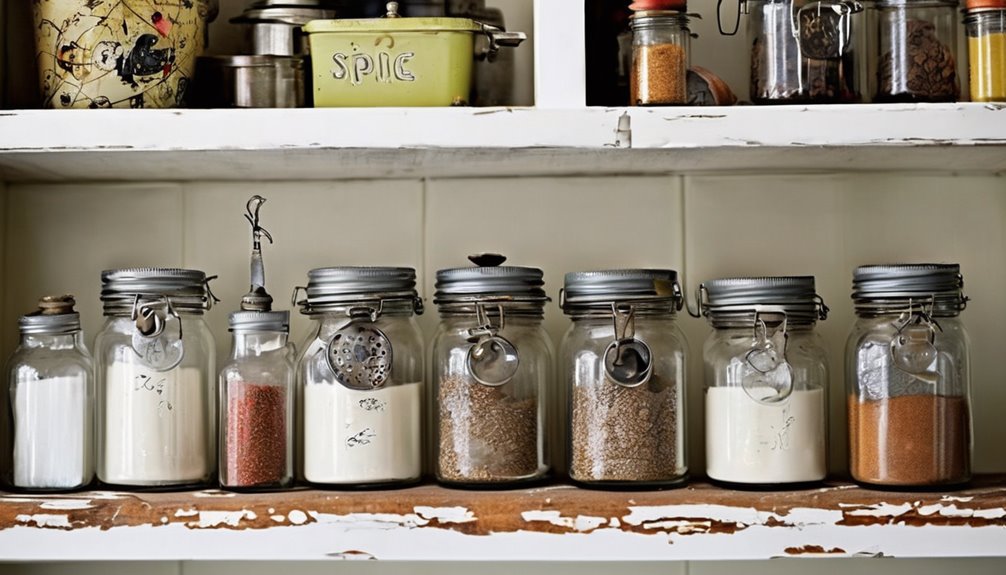
You can repurpose old jars, baskets, and small crates to boost pantry organization without buying new. Think vertical—stacked shelves and labeled bins maximize every inch while keeping costs down. Start with a simple plan for upcycled pantry fixtures that improves access and reduces clutter. DPI range can guide you to choose sturdy, responsive storage options that adapt to different jar sizes and crate depths.
Upcycled Pantry Organization
From junk to joy, upcycled pantry fixtures transform clutter into tiny, space-saving solutions you can actually afford. You’ll organize with intention, using thrifted pantry finds and upcycled organizers that breathe new life into your cabinets. No fluff, just practical results you can feel. A 5-Quart capacity mindset helps you balance compactness with versatility, especially for small- to medium-sized kitchens dishwasher-safe baskets and easy maintenance.
Space-Saving Shelf Solutions
Space-saving shelf solutions start with simple, upcycled tweaks that free up vertical and narrow spaces without breaking the bank. You’ll repurpose thrifted brackets, slim baskets, and tiered organizers to maximize every inch. Prioritize compact storage by labeling containers, stacking bins, and using adjustable shelves to adapt to changing items. Attach magnetic strips for metal tools or spice tins, freeing counter space for prep work. Consider a pegboard wall for lightweight, frequently used ingredients, keeping them visible and reachable. Choose durable, recycled materials to preserve energy and reduce waste, and balance aesthetics with function so your kitchen feels welcoming and inclusive. This approach delivers thrifted efficiency without clutter, turning tight spaces into a practical, shared space you’ll love. durable, recycled materials
Quick Lighting and Insulation Tweaks That Cut Bills
Looking for quick wins to trim bills? You’ve got this. In this thrifted energy-smart tale, simple lighting choices and tiny insulation tweaks add up, without wrecking your budget or vibes. thrifted lighting can shine efficiently when you swap to LED fixtures and dimmers, using warm tones that feel cozy and inviting. insulation tweaks seal drafts around doors, windows, and baseboards, turning your space more snug. You’ll notice steadier temps and lower bills, plus less noise and more comfort. Here are quick steps:
- Replace bulbs with LED equivalents
- Add weatherstripping to doors
- Use draft stoppers at thresholds
- Seal outlets and switch plates with affordable foam gaskets
A Step-by-Step 30-Day Makeover Timeline You Can Follow
Could you makeover your kitchen in just 30 days? Absolutely. This step-by-step timeline keeps you practical and supported, not overwhelmed. Week 1 focuses on vision and thrifted budgeting: set clear energy goals, audit appliances, and identify low-cost swaps. Week 2 tackles decluttering and plugin-free upgrades—harvest bulbs, weatherstripping, and ceiling vents that boost efficiency. Week 3 brings in smarter organization, paint, and reusable materials, aligning with budget limits and community reuse. Week 4 confirms progress, seals final details, and documents savings to celebrate your energy goals. Pace matters: little, consistent actions compound. Involve family or neighbors for accountability and shared learnings. By month’s end, you’ll feel connected, capable, and part of a thrifty, eco-conscious community.
Frequently Asked Questions
How Can I Measure ROI on Thrifted Upgrades?
Sure—you measure ROI on thrifted upgrades by tracking cost vs. energy savings and resale value, plus time and satisfaction. Start with a clear baseline, note every thrifted purchase, and calculate payback with annual savings from reduced bills. Include intangible gains like comfort and bragging rights. Use measuring payback, thrifted upgrades as your terms. Keep it eco-conscious, budget-focused, and inclusive, so you feel you belong in a community that values smart, shared improvements.
Which Minor Fixes Yield Instant Energy Savings?
Tiny fixes yield instant energy savings: seal gaps, swap incandescent bulbs for LEDs, and weatherstrip doors. You’ll notice the energy impact when you tighten up drafts, switch to efficient plugs, and use smart power strips. Thrifted upgrades can be layered later, boosting ROI measurement as you track bills. You belong here—practical, budget-minded teams saving together. Each tiny fix matters, building a greener home you feel good about, without breaking the bank or wait times.
Do DIY Upgrades Affect Home Insurance Coverage?
Yes, DIY upgrades can affect your insurance, so you should check with your provider before making changes. If you pursue thrifted upgrades, document materials, installation, and safety checks to show care and compliance. This matters for coverage and premiums, especially for electrical or plumbing fixes. Keep receipts and quotes handy, and note eco-conscious, budget-friendly choices to build trust. Understanding insurance implications helps you stay protected while you feel a sense of belonging and stewardship.
What Safety Checks Ensure Thrifted Appliances Work?
Are you wondering how to verify thrifted appliances are safe to use? Start with basic checks: inspect for damaged cords, test plugs, and look for fraying. Check safety plug ins, ensure grounded outlets, and replace worn electrical cords. Run a low-risk test before full use, and keep a fire extinguisher handy. This practical, eco-conscious approach saves money, foster belonging, and protects your home while you reuse responsibly. Have you double-checked the cords and plugs today?
How to Prioritize Tasks Under Time Constraints?
You can seize deadlines by prioritizing tasks from urgent to important, then tackling quick wins first. You’ll stay on track by grouping related steps, trimming non-essentials, and delegating when possible. Seizing deadlines means you plan with real time buffers and eco-conscious choices, avoiding wasteful detours. Prioritizing tasks keeps your budget intact, while you build a sense of belonging with teammates and neighbors who share frugal, practical goals. You’ll feel accomplished and greener as you progress.