Turn your tiny kitchen into a efficient hub with safe, repurposed gear. Start by evaluating space and needs, then punch up counter space with quick wins like multipurpose tools, magnetic knife strips, and slim organizers. Use wall-mounts and stackable solutions to expand capacity, turning surfaces into dedicated prep zones. Favor food-safe plastics and nonreactive metals, avoiding porous or cracked items. If you keep going, you’ll uncover layouts, safety, and maintenance tips that make this truly work for you.
Key Takeaways
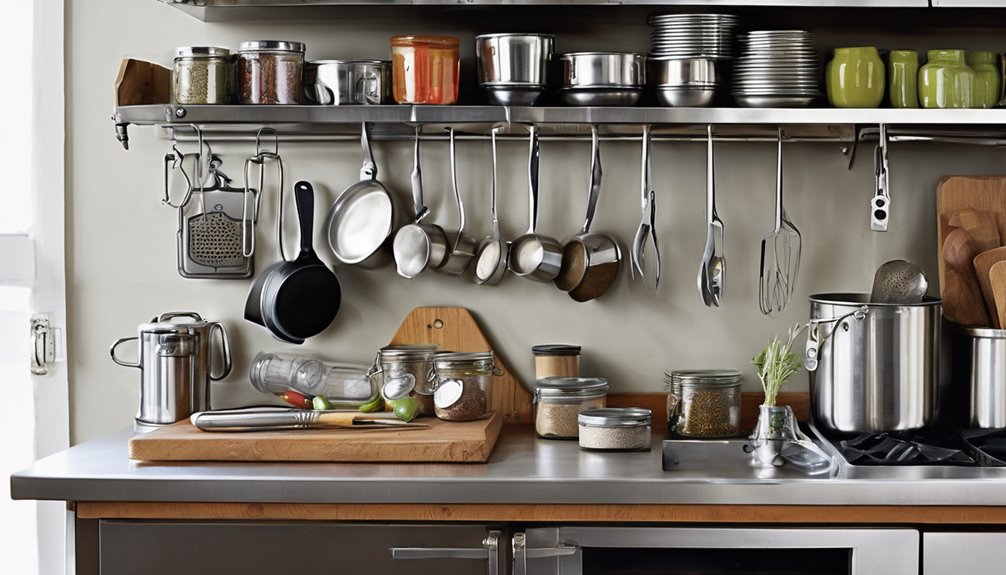
- Use wall-mounted rails and magnetic strips to store frequently used tools, freeing counter space and improving visibility.
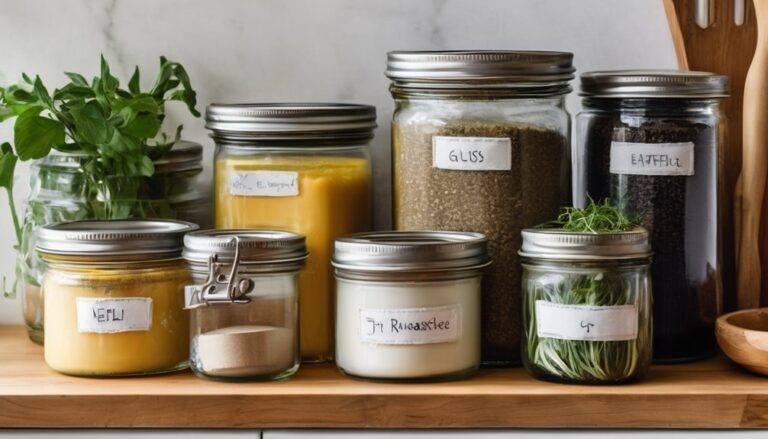
- Repurpose jars, baskets, and old mugs as quick-grab stations for spices, lids, and utensils.
- Turn cutting boards into portable prep stations; slide out and stow away to save surface area.
- Stack containers and modular supports to double cabinet capacity without expanding footprint.
- Create dedicated zones (prep near fridge, wash near sink) to streamline workflow in tiny kitchens.
What Counts as Safe Repurposed Gear for a Tiny Kitchen
What counts as safe repurposed gear for a tiny kitchen? You’re choosing pieces that are proven, practical, and job-focused. Prioritize items with clean safety records, minimal coatings, and intact seals. Look for food-safe plastics and nonreactive metals to avoid flavor transfer and contamination—safe plastics with BPA-free labels matter, and they’re easier to clean in tight spaces. Prioritize sturdy corners, stable bases, and easy-grip handles that reduce accidents. Avoid chipped enamel, cracked glass, and rust-prone metals; rust prevention should guide your choices. Think versatile: a pot can double as a mixing bowl, a sturdy lid becomes a strainers’ frame. Label surfaces you repurpose, keep a small cleaning kit handy, and routinely inspect for wear. With careful selection, you’ll feel confident, organized, and connected to your compact kitchen. Lumbar support and back-friendly design considerations also help when you’re spending long hours organizing and prepping in a small space.
Start Here: How to Assess Your Space and Needs
Start by sizing up what you actually have and what you need, using a simple, two-step check. First, map your space: measure counters, doors, and corner gaps, noting any fixed obstacles. Second, list your must-haves and nice-to-haves—then rank them by frequency and importance. This is your space planning compass, guiding where gear fits without crowding. As you assess, run through safety checks: check outlet reach, heat sources, and cleanable surfaces. If something feels off, reallocate or repurpose rather than force it in. Keep your pack light and flexible; consider modular, stackable options that grow with your needs. You’re building belonging through mindful choices, not overstuffing. Decide what stays, what moves, and what you’ll upgrade later, with clarity and confidence.
Quick Wins: Everyday Tools to Free Counter Space
Can we reclaim counter real estate without a full reorg? You can, with quick wins that feel like a team win. Start small: scan for tools you hardly use and replace them with multipurpose items from repurposed gear. Think magnetic strips for knives, a fold-down cutting board attached to the wall, and a slim in-drawer organizer that doubles as a lid holder. In tiny kitchens, space is earned, not given, by routine, not bravado. Invest a few minutes to straighten cords and stash gadgets in dedicated bins—clear fronts help you see options, not clutter. Choose items that streamline prep: a single pot, a compact grater, a versatile spatula set. With intentional choices, you’ll notice counter space growing, and you’ll belong to a kitchen that works.
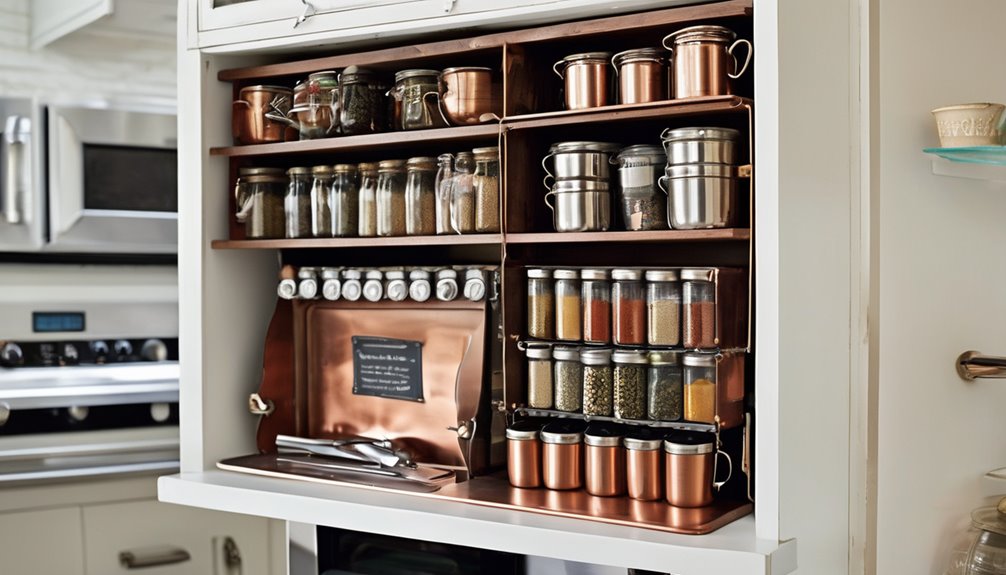
Wall-Mount and Stack Hacks for Instant Gains
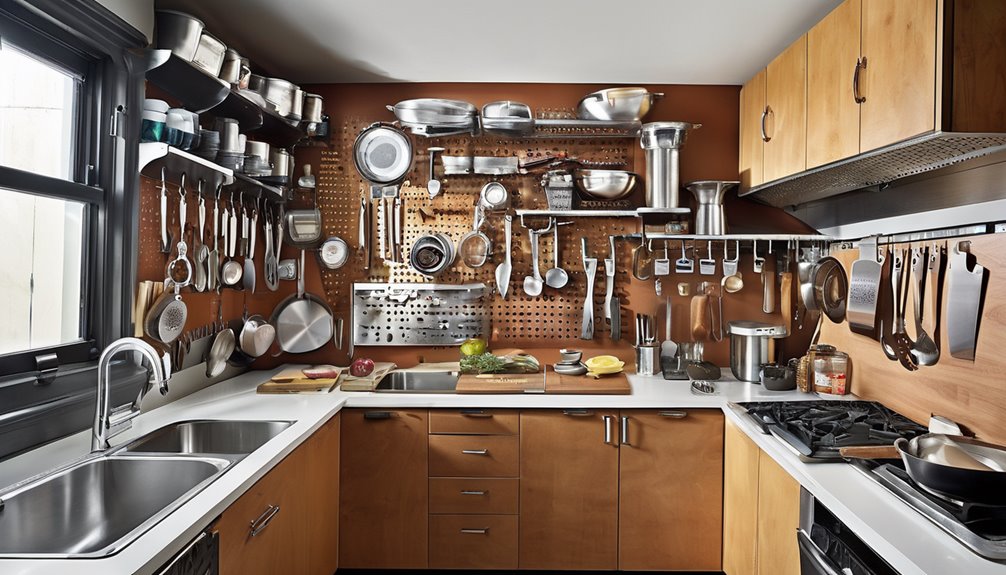
Wall-mounting and simple stack solutions deliver instant gains by turning vertical space into usable kitchen real estate. You’re simplifying access to frequently used tools and ingredients, keeping them within easy reach. A wall mount keeps lids, spices, and measuring cups visible without crowding counters, so you feel organized and included in a shared cooking rhythm. Stack hacks let you double or triple fridge and cabinet capacity by layering containers, trays, and gadgets in a logical order. Choose modular supports that fit your space and style, then label for quick recognition. The payoff is practical: faster prep, cleaner surfaces, and a sense of belonging as everyone finds their gear where they expect it. With intentional placement, instant gains become lasting habit. wall mount, stack hacks, instant gains, and space optimization.
Turn Surfaces Into Storage and Prep Zones
Ever considered turning every clear surface into a quick-access workspace? You can, by designating tiny kitchen zones that flow into daily routines. Convert a cutting board into a portable prep station, then slide it to the counter when you’re done. Use repurposed gear like a crate or a tray as a temporary backsplash shelf for spices and utensils. Keep surfaces uncluttered by pairing tasks with specific areas: chopping near the sink, baking near the oven, washing up near the drying rack. Wall-mounted rails or a simple rack can hold frequently used tools without stealing counter space. Prioritize accessibility and consistency; when surfaces become stores, you feel connected and efficient. Small shifts, big gains in belonging and function.
Magnetic and Modular Helpers for Fast Access
Magnetic grip solutions and modular access strategies let you grab what you need in a flash. Let’s explore smart setups that strengthen quick access as long as you stay tidy. Add a dedicated LCD-readout wall mount for quick temperature reference in busy kitchens with gooseneck kettles readable temperature display.
Magnetic Grip Solutions
Magnetic Grip Solutions put fast-access pieces at your fingertips, letting you grab spices, knives, or tools without rummaging through drawers. You’ll notice magnetic storage that keeps basics within reach, while reducing clutter. The grip durability of metal followers and strong magnets ensures items stay put during quick grabs and busy mornings. This approach feels communal and simple, inviting you to share space without conflict. You’ll appreciate the confidence of a tidy, accessible kitchen that still looks inviting. Wide chutes and slow-press juicers from the 5.8-inch wide chute range reinforce the idea that compact setups can handle whole produce with minimal prep.
Modular Access Strategies
Have you ever wished for a kitchen that adapts as you cook? Modular access strategies keep your workspace lean while speeding tasks. Start with magnetic and modular helpers that snap onto rails, lids, and racks for instant reach. Group frequently used tools by task, not alphabet, so your routines form predictable, repeatable flows. A solid concept pivot: reframe storage as active, not passive—pull out what you need, when you need it, and tuck it away just as quickly. Use budget shade: affordable, mixed-material components that blend with your decor while maximizing depth and height. Label everything in a simple, tactile way so teammates feel welcome and confident. Small changes compound—your counter feels open, and cooking becomes collaborative. HUANUO emphasizes a stable, one-piece desktop surface that reduces seams and wobble, reinforcing how a durable, continuous workspace can translate to steadier hands and smoother transitions when moving between tasks. one-piece desktop ensures rigidity and supports multi-task workflows without creaks or flex.
Budget-First Repurposing: Free or Low-Cost Tricks
You can start with free space savers you already have around the house, like mason jars for lids or drawer organizers from old cereal boxes. Look for low-cost repurposes that maximize vertical storage, such as hanging racks or tension rods, which come in at little to no extra cost. Share practical tips you’ve found orDIY hacks that prove you don’t need to spend to gain extra cabinet and counter space. Increase efficiency by choosing high-wattage kettles only when you need fast boils, which can free up counter time for other tasks boil speed and efficiency.
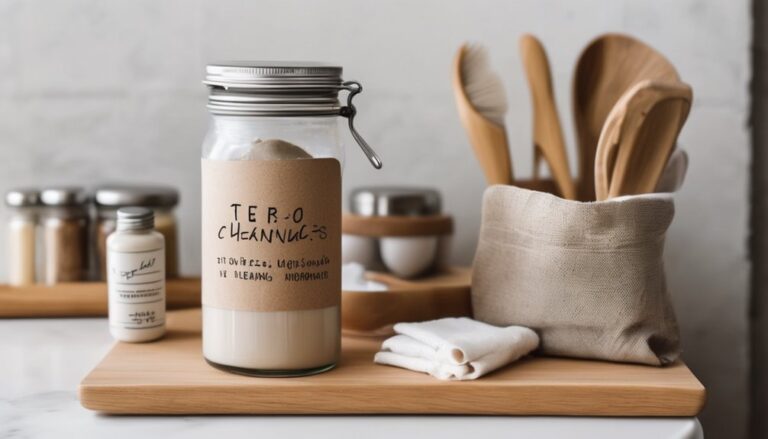
Free Space Savers
Small space lives require clever, budget-friendly moves, so here are free or low-cost tricks that actually work. You’ll discover compact hacks that stretch every inch without adding clutter, thanks to smart gear repurposing and simple swaps you can trust. Incorporating a stable stand mixer base can also help with efficiency during batch tasks, aligning with how sturdy bases reduce wobble in large-batch setups stability features.
Low-Cost Repurposes
Low-cost repurposes lean on everyday gear you already own, turning what’s idle into smart storage without widening your budget. You’ll uncover compact surfaces that double as organizers, turning shelves into streamlined work zones. With a few budget hacks, jars, baskets, and old mugs become quick-grab stations, while tension rods cradle spices and lids without drills. You won’t need new purchases to gain breathing room in tight kitchens.
| Visual cue | Practical use |
|---|---|
| On-counter rail | Keeps measuring spoons reachable |
| Hanging basket | Stashes produce tops and cords |
These small shifts create belonging: a kitchen where every item has a home, and you feel confident navigating your space. Budget-first, stress-free, and ready for everyday life.
Safety First: Food-Grade Choices for Repurposed Gear
Are all repurposed kitchen items truly food-safe? You want peace of mind, not guesswork. Focus on safety protocols and choose items made from food grade materials. When in doubt, verify labeling, and avoid porous plastics that stain or hold odors. Clean, dry, and inspect before use, and designate a dedicated prep zone to prevent cross-contamination. If a piece shows cracks or wear, replace it rather than improvise.
Choose food-grade plastics, stainless steel, or glass
Look for clear labeling and material codes
Avoid reusing nonfood-safe containers or painted surfaces
Establish a dedicated, easily sanitized prep station
Sourced safety features and certifications from kitchen gear like gooseneck kettles emphasize auto shut-off, accurate temperature control, and BPA-free construction to support reliable, food-safe repurposing. food-grade materials
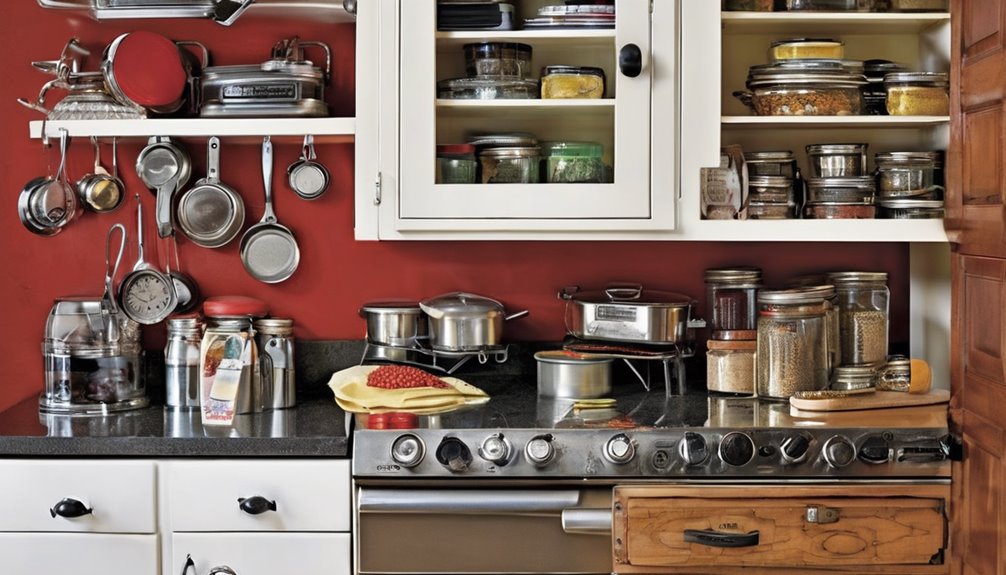
Layouts That Work: Real-World Tiny-Kitchen Setups
When space is at a premium, real-world tiny-kitchen layouts lean on zones rather than grids: a prep area close to the fridge, a stove or induction plate near ventilation, and a sink within arm’s reach of cleaning supplies. You design around workflow, not walls, so motion stays efficient and intentional. Place a compact prep surface beside your fridge, then tuck in a dedicated waste area and a dish-cleaning zone within one arm span. Use repurposed gear as modular anchors—an old cutting board becomes a rolling prep station, a salvaged rail supports a pot rack, a narrow shelf holds spices. A tiny kitchen thrives on clarity, accessible storage, and shared ownership of space, fostering belonging through organized, smartly repurposed layouts.
Maintenance Tips to Keep Repurposed Gear Working
Keep your repurposed gear reliable with quick, regular knife- and surface-cleaning routines, plus a simple check of alignment before each use. Tighten and recalibrate tools as needed, and store them in a way that prevents wobble or moisture buildup. Mind safety with clear storage tips, and note any wear that signals when to service or replace parts. Highlight the importance of stable work surfaces and use a sturdy, adjustable setup to maintain accuracy during tasks stability and setup across varying loads.
Regular Cleaning Routines
Regular cleaning keeps repurposed gear reliable, so set a simple weekly routine: wipe down surfaces, check moving parts for debris, and rinse or air-dry components as needed. In a tiny kitchen you’ll appreciate how neat habits prevent buildup and simplify use, so you feel like you belong to a shared, capable space. Non-slip bottom helps keep equipment stable on slick countertops, reducing accidents during quick cleanups. – Wipe screens, knobs, and handles after each use
- Inspect gears and hinges for grit; remove it gently
- Rinse removable parts; air-dry fully before reassembly
- Store items upright to prevent moisture pockets and mold
Consistency beats intensity, so pick a short cadence you can sustain. This routine protects your gear, saves time, and keeps every repurposed tool ready for the next task. Your kitchen, your crew, your flow.
Tool Alignment Checks
Tool alignment checks keep repurposed gear reliable after a week of use. You’re keeping things simple, so you’ll run quick checks before each session. Start with a visual once-over: align blades, gauges, or hinges to their marks, and note any looseness. If you feel play, tighten cautiously and test again. Next, run safety checks to confirm moving parts engage cleanly and stop where they should. Listen for odd sounds, friction, or binding, and address them before you continue. Balance is key: confirm handles and clamps sit level and stable on the work surface. Document small misalignments and fixes, so you stay consistent. When in doubt, establish a routine you trust, because reliable gear makes you feel part of a skilled group.
Safety and Storage Tips
Ever wonder how to keep repurposed gear safe and reliable after a quick day in the workshop? You want this system to feel like it belongs in your kitchen, not a shed. Practice compact circulation by storing items upright and labeled, so airflow stays steady and corrosion stays away. Check fit and repurpose compatibility before each use, rotating parts as needed to prevent fatigue. Quick, simple maintenance keeps things ready for tomorrow’s meal prep or craft session.
- Inspect seals and handles for looseness; tighten or replace promptly
- Store components in a cool, dry spot with consistent airflow
- Label contents and rotation dates to track wear
- Wipe surfaces after use to deter residue and improve longevity
Frequently Asked Questions
How to Evaluate Bleeding Risks With Repurposed Gear in Kitchens?
Bleeding risk in kitchens with repurposed gear comes down to proper sourcing, inspection, and safe use. You assess coatings, edges, and seals for wear, rust, or damage, and replace damaged parts promptly. Keep first-aid basics handy, and establish a cleanup routine to prevent slips. Use non-porous, food-grade surfaces, clean tools after use, and label repurposed items clearly. If anything looks questionable, don’t risk it—prioritize safety and group norms of shared spaces.
Can Repurposed Items Affect Taste or Odor Over Time?
Yes, repurposed items can affect taste and odor over time, though you might insist it’s fine. You’ll notice a taste impact and odor retention, especially with porous or lingering materials. Practical tip: clean thoroughly, air out regularly, and rotate gear to avoid long-term effects. If you share space, you’ll feel part of a mindful community, taking steady steps to keep meals fresh while embracing clever, budget-friendly approaches.
What’s the Best Way to Sanitize Non-Traditional Kitchen Gear?
You should sanitize non-traditional kitchen gear by choosing simple cleaning steps and sticking to proven sanitizing methods. Start with a thorough rinse, then use hot, soapy water, followed by a sanitizing method that fits the material. For porous items, add extra care. Be mindful of sanitizing methods and the risks of cross contamination after each use. You’ll feel confident belonging in a clean, safe cooking space when you document your process.
Are There Size Limits for Safe Wall-Mounted Ideas?
Yes, there are size limits for safe wall-mounted ideas, and you’ll want to follow safety standards closely. Check your wall’s load capacity, device dimensions, and mounting hardware specs, then compare against the intended gear. Align with safety standards for weight distribution, anchoring, and clearance. If in doubt, choose lighter, properly secured items. You’ll feel confident knowing your setup respects size limits while making space feel like belonging, not clutter.
How Do I Maintain Access While Keeping Gear Stable?
Maintaining access while keeping gear stable starts with smart placement and secure fasteners. You’ll want quick-release hinges or gravity catches, plus shear-rated brackets for stability. Use label-friendly, wipeable surfaces and maintain accessible spacing for daily tasks. Assess Evaluating bleeding risks and ensure sanitation of non-traditional gear, cleaning logs included. Keep a simple routine: inspect mounts weekly, test access, and rotate gear to prevent crowding. You belong here, confident and connected, as you balance safety and ease.