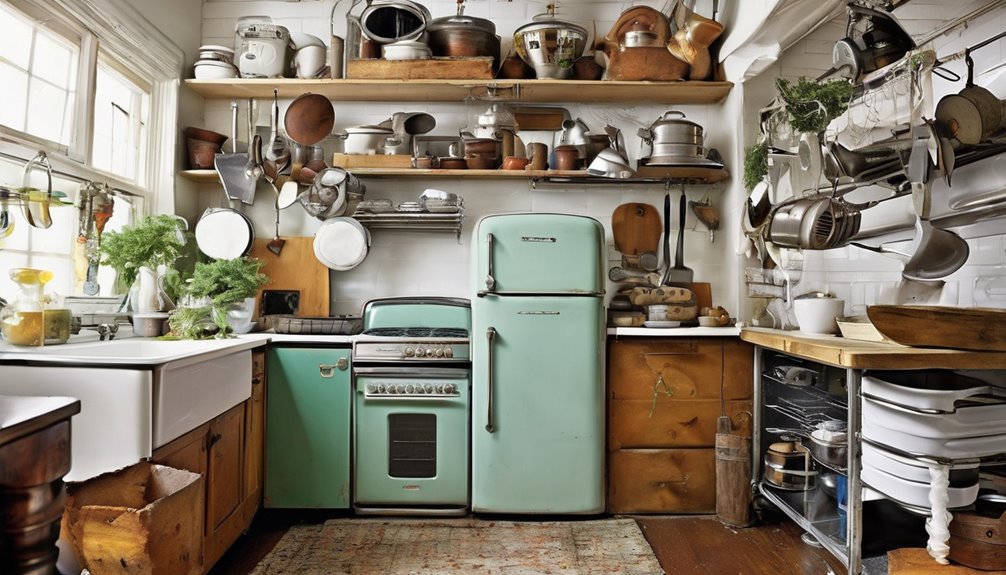
Repurposing old appliances for efficient DIY kitchen upgrades saves money, reduces waste, and speeds up momentum by using existing shells and parts. Start with a quick safety and reusability check—unplug, inspect wiring, seals, and doors, and mark unsafe items off-limits. Decide what’s worth reusing by core function, repairability, and parts availability. Upcycle fridges for organized storage, ovens as multi-task stations, and keep ventilation tight. If you stick with practical, modular ideas, you’ll unlock surprising efficiency waiting just ahead.
Key Takeaways
- Assess safety first: unplug, inspect for damage, and mark unsafe items to avoid reuse.
- Prioritize reusable components with solid parts availability for quick refurb and reliability.
- Upcycle by transforming fridges, ovens, and small appliances into organized storage and multi-use zones.
- Optimize space with zone mapping, modular storage, and compact devices that tuck away.
- Plan energy-conscious refurbishments, measure power needs, and document decisions for safe operation.
Why Repurposing Old Appliances Makes Budget Sense

Repurposing old appliances often makes budget sense since it cuts upfront costs and reduces waste. You’ll notice faster project momentum when parts and shells already exist, so you can invest where it matters most—efficiency, layout, and finishes. A nostalgia kitchen vibe isn’t just mood—it’s value, because familiar, well-loved pieces invite ownership and reuse without guilt. By reusing components, you sidestep new-purchase premiums and the energy used to manufacture something new, helping your budget stay steady. Think resale value: a thoughtfully repurposed unit can become a focal point, sparking conversations and pride. You belong to a community that values practical craft, where resourcefulness strengthens your home’s personality and keeps your upgrades affordable and smart. Reusing an app-enabled tool can also support precise cooking projects, ensuring you maintain consistent performance as you upgrade your space temperature control.
Start With a Quick Safety and Reusability Check
Before you start repurposing, do a quick safety check to spot any risks and defects. Then assess reuse viability by confirming essential functions (power, plumbing, seals) are intact and repairable. If anything looks unsafe or non-repairable, set it aside and consider safer upgrades.
Quick Safety Check
So, before you plunge in, do a quick safety and reusability check to spot obvious hazards and determine what’s actually reusable. You’ll want to unplug the appliance, inspect for frayed cords, rust, or exposed wiring, and set a safe workspace. Check doors, hinges, and seals for damage that could spill or leak. Look at model labeling for age and parts availability, noting what can be swapped or repurposed. If you spot mold, chemical residue, or coolant leaks, mark it off-limits and set it aside. Make a quick judgment about structural integrity and weight. This quick safety, plus a lean reusability check, helps you decide what can be saved, recycled, or repurposed without risking your project or you. Safety guidelines provide a framework to assess and compare different appliance remnants effectively.
Reuseability Viability Assessment
Ever wonder how to tell if an old appliance is worth salvaging for a DIY kitchen upgrade? Start with a quick safety and reusability check. Inspect for exposed wiring, rust, leaks, and unusual smells; if any appear, set it aside. Assess core components: motor health, seals, and switches—are they reliable or easily replaceable? Consider tool durability: can you source parts or adapt adapters without compromising safety. Evaluate energy efficiency potential; even older models may be repurposed with minimal rework, reducing waste and aligning with recycling ethics. Test basic function only if you’re confident in safe operation. If it passes, draft a simple refurb plan and budget. If not, recycle responsibly and connect with community repair networks to extend the appliance’s life. For any project, prioritize stable, safe operation and plan around the desk’s or appliance’s original design limitations to avoid unsafe modifications reusability assessment.
How to Decide What Is Worth Reusing

You start by sizing up each item’s usefulness now, not later—focus on core functions you actually need. Consider repairability, parts availability, and how long it’ll last in a kitchen before you commit to reuse. This quick screen saves time and keeps your project practical and efficient. Pelvic Alignment
Assess Worthiness Early
Assess worthiness early by measuring fit, reliability, and potential energy savings. Look beyond looks to whether upgrades align with your budget rationale and daily routines. If an old appliance requires costly fixes or won’t improve efficiency, drop it. Favor items with straightforward retrofits, solid parts availability, and reasonable downtime during upgrade projects. Prioritize pieces that inspire confidence and belonging in your space.
- A compact mixer that can be wired into a single-bowl setup for compact counters
- An old oven with retrofit-friendly controls that can boost energy efficiency
- A sturdy fridge frame ripe for temperature-tightening and smart adaptation
A practical first step is to consider models with auto-cleaning and easy maintenance features, such as dishwasher-safe components and simple descaling approaches, which can reduce ongoing upkeep and downtime during upgrades. AquaClean compatibility and other maintenance conveniences consistently support long-term ease.
Practical Reuse Considerations
So, how do you decide what’s worth reusing in a kitchen upgrade without wasting time or money? You assess fit, safety, and longevity first, then consider cost savings and design cohesion. Prioritize appliances with solid frames, usable electronics, and straightforward fixes. If a unit is beyond repair or poses recurring electrical safety risks, pass it along for parts or recycling rather than retrying. Be honest about scale: bigger gains come from items that truly match your goals, not from stockpiling leftovers. Remember recycling myths can tempt you to push risky projects; verify with a pro. Below, quick sanity checks you can apply now.
| Quick fit | Red flags |
|---|---|
| Matches space and power | Unrepairable components |
| Functional core parts | Excessive corrosion |
| Safe wiring paths | High voltage hazards |
Upcycling Refrigerators: Storage Hacks That Save Energy
Upcycling a tired fridge into smart storage isn’t just about recycling; it’s about reclaiming space and slashing energy use. You’ll turn a bulkier unit into organized zones that cut clutter and boost efficiency, tapping the power of existing insulation to keep items cool with minimal effort. Start by removing shelves to create staggered compartments for dry goods, jars, and snacks, then dedicate a drawer for produce. Use magnetic bins on the door for small tools and labels that reinforce routine, so everyone in your home feels welcome to help. The result is a homey, energy-saving hub that respects old fridges and the people who share your kitchen. Insulation naturally helps maintain temperature, supporting the long-term energy efficiency of your repurposed storage system.
- Clear zones for dry goods, produce, and snacks
- Magnetic door bins for tools and labels
- Labeling system to invite participation and care
Transform Ovens Into Efficient Cooking Stations
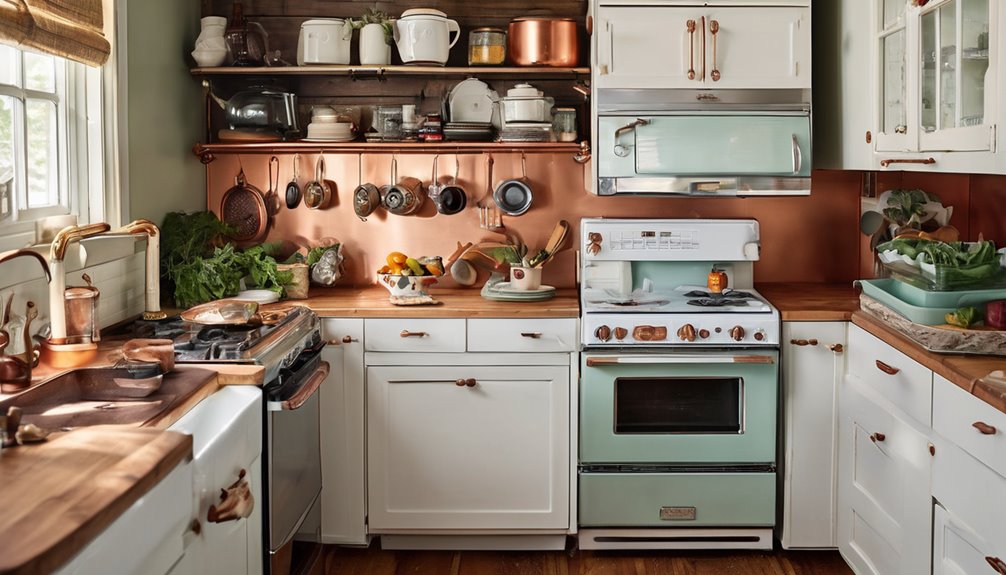
Transforming an oven from a basic heat source into an efficient cooking station starts with clear zoning and smart workflow. You’ll map zones for prep, cooking, and cleanup, then align tools to each area for quick, seamless transitions. A reuser strategy guides you to repurpose panels, racks, and drip trays into organized stations that minimize movement and waste, while safety tradeoffs are weighed—keep ventilation clear and avoid overloading circuits. Use your oven’s heat profiles to multi-task: bake, roast, and broil as separate functions to expand repertoire without extra appliances. zoning and workflow optimization also help maximize energy efficiency and reduce single-purpose gadget clutter, making your kitchen more versatile and streamlined.
| Zone | Tooling | Outcome |
|---|---|---|
| Prep/Chop | Cutting boards, waste bins | Faster setup, reduced mess |
| Cook | Racks, pans | Even heating, varied textures |
| Clean | Linens, brushes | Hygienic, ready for next use |
Repurposing Small Appliances for Space and Efficiency
Choosing the right small appliances for your counter or shelves can free up valuable workspace. Focus on devices that serve multiple roles or that tuck away when not in use, like compact mixers, toasters, or immersion blenders. By pairing space-saving roles with a streamlined routine, you’ll boost everyday efficiency without sacrificing functionality.
Space-Saving Appliance Roles
Ever wonder how a few small tweaks can free up counter space yet boosting kitchen efficiency? You’ll find space-saving roles in every sturdy, repurposed unit, chosen to blend with your daily rituals rather than crowd them out. Think multi-use devices tucked into drawers or mounted under cabinets, so you gain width without losing function. By assigning each appliance a single, purposeful job, you minimize clutter and maximize flow. Remember to address recycling myths and budget risks upfront—set practical limits on new uses and materials, and repurpose with care. Your goal is seamless integration that feels natural, not conspicuous. A compact blender mounted under a cabinet for quick smoothies Memory presets offer convenient, repeatable setups for daily blends, while keeping the countertop clear. A toaster oven converting to a dedicated mini-baking station can benefit from a two-piece desktop approach to reduce warping and ensure stable operation over time. A slow cooker stored in a pull-out bin for easy access helps maintain a clean and organized workflow.
Streamlined Kitchen Efficiency
How can repurposing small appliances streamline your kitchen without sacrificing function? You’ll spot clutter shrinking when you group compatible devices and designate a single counter zone for prep, blending form with flow. Think multi-use tools, like a compact blender that doubles as a food processor, or a toaster that handles mini roasting duties. By choosing modular storage, you free drawers for towels, lids, and gadgets you actually use weekly, not annually. This approach makes you feel grounded in a shared kitchen space—everyone understands where things belong. Be mindful of recycling myths and budget myths: opt for durable upgrades, not impulse buys, and recycle or donate outdated units. The result is a calmer, more intentional kitchen where efficiency supports daily belonging and less waste. Space-saving ideas also align with using modular storage and versatile tools to maximize function in small footprints.
Ventilation Options for Reused Appliances
Ventilating reused appliances isn’t an afterthought—it’s essential to keep smells, heat, and moisture from turning your DIY kitchen into a problem area. You’ll want a practical plan that fits your space and budget, focusing on ventilation design and ducting strategies that feel seamless with your remodel. Consider locating vents where air naturally flows, and choose quiet, efficient options so you feel invited, not reminded, of the workload. Tailor paths to minimize obstructions and reuse existing openings when possible to save time and expense. Ensure seals are tight and hum-free, from appliance enclosure to outside vent. Your goal is steady air movement that doesn’t shout for attention. Quiet, unobtrusive fan placement that blends with cabinets Short, direct duct runs with proper vent caps Sealed connections and clear labels for easy maintenance efficient 20-bar pressure
Repair or Replace: A Fast Diagnostic Guide
When you’re weighing repair vs. replace, you want a quick, reliable read on the odds and the payoff. Here’s a fast diagnostic you can trust: assess the cost of parts and labor against a new unit, and gauge reliability after a potential repair. Use a practical repair guide to map common failure points and realistic timelines. If symptoms repeat within a short window, apply the replacement criteria: age, energy use, and warranty status. Consider safety, efficiency, and your kitchen’s needs. Keep your decision grounded in data, not sentiment. This guide helps you feel supported, not overwhelmed, so you’ll act with confidence. If you’re leaning toward replacement, document your rationale and plan for smooth integration with existing setups.
Simple Energy Tweaks: Seals, Insulation, and Power Management
Smart energy tweaks can add real warmth to your kitchen without a full overhaul: start with seals, insulation, and smart power management to cut drafts, curb heat loss, and dial down energy use. You’re not just saving money—you’re crafting a cozier space where every gadget feels thoughtful and purposeful. Do a quick energy audit of doors and windows, then chase simple seal optimization with weather stripping or foam to snug the gaps. Add insulation around pipes and vents to keep heat where you want it. Pair that with efficient power habits: program appliances, unplug idle chargers, and use smart strips. Your kitchen becomes a shared, mindful space.
Smart energy tweaks turn the kitchen cozy with fewer drafts and smarter power habits.
- Tighten gaps around doors and windows for immediate comfort
- Insulate exposed pipes and ductwork to reduce heat loss
- Use smart power management and unplug idle devices for efficiency
Real-World Projects: Step-by-Step Repurposing Ideas
From here, you’ll see how to turn old appliances into practical upgrades you can actually use in your kitchen. Real-world projects break down into simple, repeatable steps you can follow this weekend. Start with a small, visible upgrade: convert an old toaster into a compact herb dryer by removing the crumb tray and adding a shallow tray for airflow. Next, repurpose a defunct dishwasher into a thoughtful fruit-and-vegetable wash station—seal connections, mount near the sink, and label for safety. A retired fridge becomes a dedicated fermentation cabinet with adjustable shelves. Be mindful of upcycling myths and budget friendly pitfalls: measure power needs, avoid overloading circuits, and test temperatures gradually. These practical tweaks foster belonging as you learn, share, and refine together.
Frequently Asked Questions
Can Repurposed Appliances Void Existing Home Warranties?
Yes, repurposed appliances can void existing home warranties, especially if they’re not installed, operated, or maintained per the appliance policy. You might confront mixed messages and fear, yet you’ll gain clarity—like a neighbor offering a helping hand. Consider documenting modifications and consulting the retailer or manufacturer about repurposed warranties. Stay practical: weigh risks, insist on compliant parts, and keep receipts to protect coverage where possible within your appliance policy.
What Safety Certifications Matter for Repurposed Units?
Yes, you should look for safety certifications like electrical and appliance standards when repurposing units. Prioritize items with clear security labeling and verified energy compliance, so you’re not risking overloads or noncompliant mods. You’ll feel confident knowing the tech meets current guidelines, and it helps you avoid hazards. If something lacks certification, you’ll skip it. Keep receipts and documentation handy as you assess each piece, reinforcing a practical, belonging-filled approach to your project.
How to Estimate Total Retrofit Costs Upfront?
You estimate total retrofit costs upfront by treating your project like building a bridge from your kitchen’s old bones to new, sturdy habits. List every part, tool, and labor hour, then add contingency. Use local vendors for quotes, group purchases, and reuse where safe. Track potential permit fees and utility upgrades. This cost estimation builds upfront budgeting you can trust, fostering belonging as you plan with friends and neighbors who share DIY pride.
Are Recycled Parts as Durable as New Ones?
Recycled parts can be durable, but you’ll want to check specs and warranties. In general, expect some variability in recycled durability and address reliability concerns up front with testing and compatibility checks. You’ll feel more confident when you document provenance, perform thorough inspections, and use trusted sources. With careful selection, you’ll build projects that feel reliable, practical, and belonging—proving that recycled durability can meet your kitchen upgrade goals without sacrificing peace of mind.
Which Local Codes Affect DIY Appliance Changes?
Local code compliance shapes what you can DIY, and yes, permit requirements often apply. You’ll want to check your city or county’s electrical, gas, and plumbing rules before any changes. Talk to inspectors early, keep drawings handy, and document renovations. When in doubt, choose safer, simpler updates that stay inside code limits. By planning around permit requirements, you’ll build confidence, stay legal, and feel you truly belong in a community that values safe, thoughtful improvements.