DIY upcycled kitchen countertops save you money by reusing salvaged remnants like wood, metal, and ceramic tiles. Start with a simple palette, test pieces together, and limit to two or three main tones plus a highlight. Check your space and substrate first, ensure a solid, level base, and prep thoroughly—clean, repair cracks, and lightly sand. Fit pieces, seal with a compatible product, and maintain with easy, budget-friendly upkeep. For more practical steps, you’ll uncover how each stage comes together.
Key Takeaways
- Source locally available remnants and salvaged materials to maximize budget savings and sustainability.
- Plan a cohesive palette with 2–3 main tones and one accent for readable, intentional design.
- Assess substrate, ensure a level, sturdy base, and check for plumbing/electrical interference before starting.
- Prep surfaces thoroughly: clean, repair cracks, sand lightly, and verify compatibility of adhesives and sealants.
- Dry-fit pieces, cut to fit, seal in thin coats per manufacturer directions, then test stability after curing.
How Upcycled Countertops Save Money and Look Great
Upcycled countertops save you money by turning what would be waste into usable, durable surfaces. You’ll slash material costs by repurposing remnants, bargain finds, and scrap pieces from local suppliers. This approach supports practical budgeting without sacrificing function or style. When you consider upcycling ethics, you’ll weigh environmental impact, community benefit, and your own values, strengthening your sense of belonging to a craft-minded circle. Source scarcity becomes a reality you respond to with thoughtful sourcing, choosing items that fit your project’s needs rather than chasing trends. Be cautious of non verified techniques; verify measurements, compatibility, and safety data before you begin. Safety concerns require proper PPE, ventilation, and tested adhesives to protect you, your family, and your workspace.
Plan Your Palette: Materials You Can Reuse on Upcycled Countertops
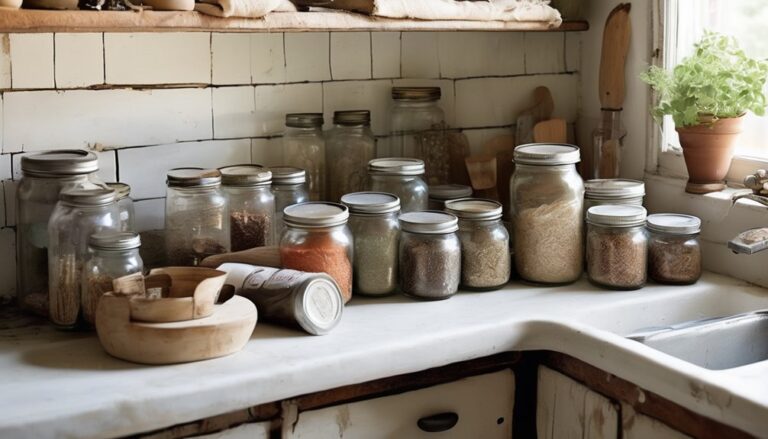
You can start by sourcing reusable materials that fit your counter space and style, like salvaged wood, metal, or ceramic tiles. Check each option for durability, compatibility with your chosen surface, and easy cleanup to keep the palette cohesive. Consider how colors, textures, and sizes mix well together to guide your palette decisions and reuse sources.
Reused Material Sources
Looking for practical sources to shape your palette? You’ll start with local, accessible options that fit your budget and values. Reused material sources mean you prioritize what’s already out there, not what you hope to find later. Begin with reclaimed sourcing from cabinetry scraps, countertop remnants, and building-material回exchanges—look for pieces that can be cut and cleaned without compromising integrity. Don’t overlook architectural salvage yards, community workshops, or friends renovating spaces; these often yield unique textures and stories you can celebrate in your kitchen. Confirm safety considerations early: avoid materials with toxic finishes, ensure structural soundness, and seal surfaces properly. Keep a simple log of where every piece came from to honor reuse and maintain easy future repairs. Incorporating guidance from available ergonomic chair models with adjustable lumbar support can inspire you to plan for long-term comfort during kitchen projects, especially when selecting work surfaces and seating for prep areas adjustable lumbar.
Palette Compatibility Tips
Ever wonder how to knit a cohesive look from reused pieces? Start with a simple theme for your palette, then test pieces against it before committing. Palette coordination means choosing a dominant color, a supporting set, and an accent, so every element reads as intentional. Don’t mix too many hues at once; opt for two to three main tones and one contrast highlight. When you size up materials, consider texture and sheen as part of color logic, not just color alone. Color blocking helps you group similar shades for cabinets, countertops, and backsplashes, creating visual blocks that feel deliberate. Keep a small swatch folder or digital board to compare pieces, then arrange before installation to confirm balance and harmony. BPA-free interiors can influence both flavor and durability of your setup as you plan your material choices.
Assess Feasibility First: Do You Have the Right Space and Substrate?

Before you immerse yourself in DIY upcycled countertops, assess whether you’ve got the right space and substrate to work with. A practical feasibility assessment starts with measuring available surface area, ceiling height, ventilation, and stability of the base. Check for a solid, level substrate that won’t flex under weight or moisture. If your existing counters sit on particleboard, confirm support and consider reinforcing edges or replacing with a sturdier core. Ensure electrical outlets, plumbing, and under-sink space won’t interfere with upgrades. Assess whether tools, materials, and time fit your schedule. Confirm substrate compatibility with the chosen finish and adhesive systems, so you don’t waste effort. And, given the emphasis on durable, long-lasting builds, prioritize a substrate with stability and minimal flex to ensure lasting results durability and stability. When you’re confident in space and substrate, you’ll benefit from smoother installation and lasting results.
Surface Readiness: Cleaning, Repairs, and Primer Needs
Since you’ve confirmed you’ve got a solid space and stable substrate, it’s time to prep the surface for upcycling. Start with a thorough cleaning to remove grease and residue; use cleaning scrubs if the texture is stubborn, then rinse and dry completely. Inspect for cracks, chips, or delamination, and plan precise repairs: dust, smooth, and fill where needed. Sand lightly to create a uniform key for coatings, but avoid gouges. Wipe down again to remove dust before primer application. Evaluate primer needs based on your chosen finish; some surfaces need a bonding primer, others just a universal primer. Ensure the surface is dry, dust-free, and stable, because solid readiness equals long-lasting results and a sense of shared achievement. Proper lumbar and back support considerations during the project planning can help maintain comfort in longer work sessions, especially if the prep area will be used for extended tasks lumbar adjustment.
How to Upcycle Countertops: Paint, Epoxy, and Tile-Step by Step

Ready to transform your prep work into a fresh, durable countertop? You’ll approach painting, epoxy, and tile step by step with clear waits and checks. Start by cleaning and sanding the surface so primer bonds. Apply a bonded primer, then choose a method: paint for color, epoxy for hard, seamless protection, or tile for texture. If you layer epoxy, mix precisely and let each coat cure fully before the next. When painting, use durable, kitchen-safe enamel and seal with a UV-resistant topcoat. Tile sets add grip and character; grout with a mildew-resistant mix. Throughout, consider upcycling ethics—reuse containers, minimize waste, and document choices. Track sustainability metrics like finish longevity and repair frequency to guide future projects and foster community confidence. For added durability, select surfaces that support high weight and frequent use, such as options designed for heavy-duty or all-day performance. sustainability metrics
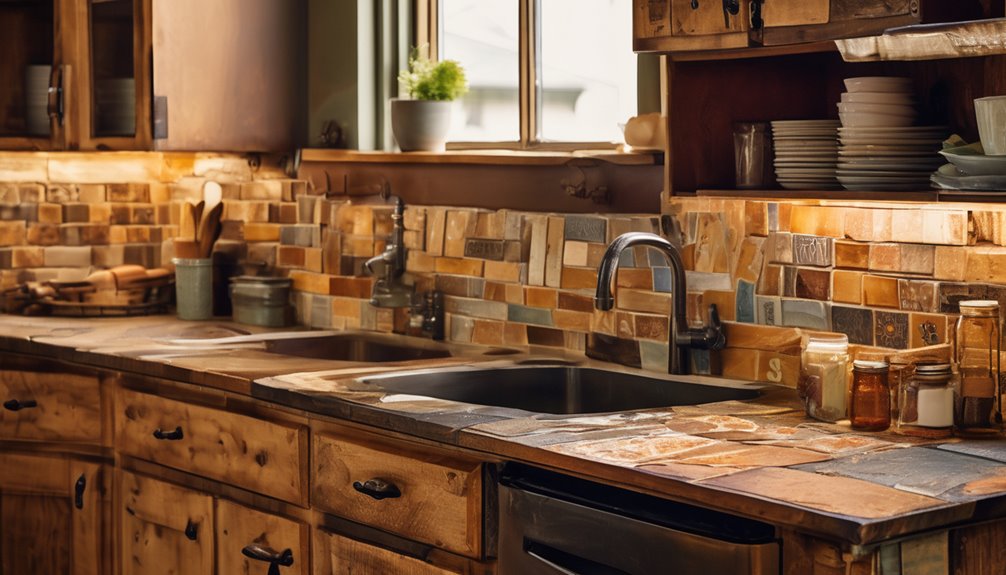
Budget-Friendly Materials: Reclaimed Wood, Metal, and Stone Fragments
You’ll explore reclaimed wood options, noting how boards with tight grain and minimal defects stay durable when sealed. Consider mixed-material setups that pair metal trim or backing with stone fragments for added contrast. Start by assessing each material’s sourcing, moisture content, and compatibility with your finish to keep costs low and results practical. Leveraging sturdy construction principles can help ensure long-term stability when you attach countertops to existing cabinetry, much like how a reliable desk frame supports heavy loads lift-cycle reliability.
Reclaimed Wood Options
Reclaimed wood, metal fragments, and stone scrap can make budget-friendly kitchen countertops that look both warm and durable. You’ll start by selecting boards with straight grain, stable cores, and minimal checks. Look for reclaimed maple, oak, or walnut that’s structurally sound, then plane edges flat for seamless joints. For visual impact, mix reclaimed wood with metal accents—think brushed steel bands or corner caps—to add modern contrast without shouting. Treat surfaces with a penetrating sealer that enhances grain while resisting moisture. Cut to size with a circular saw, then sand progressively from 80 to 220 grit. Dry-fit sections before final assembly, using a waterproof adhesive and hidden fasteners. Finish by applying a food-safe finish; cure, then buff for a smooth, durable countertop you’ll enjoy every day.
Mixed Material Prospects
Why stick to a single material when mix-and-match can deliver both budget savings and striking visuals? Mixed Material Prospects let you combine reclaimed wood, metal, and stone fragments for a cohesive yet dynamic countertop. You’ll prioritize compatibility: choose edges and finish styles that share a common tone or patina to enhance material synergy. Plan your layout with practical zoning—hot zones near stoves, prep areas near sinks—so the team-up feels intentional, not chaotic. For upcycled choices, start with a core board of reclaimed wood, then inset metal accents and stone fragments in high-use sections. Secure with appropriate fasteners and sealants to prevent moisture intrusion. This approach reinforces belonging by showcasing collaboration, creativity, and resourcefulness in your kitchen project. A stable underlayment and memory presets for consistent height alignment during heavy prep tasks help maintain long-term durability and ergonomic comfort in your workspace.
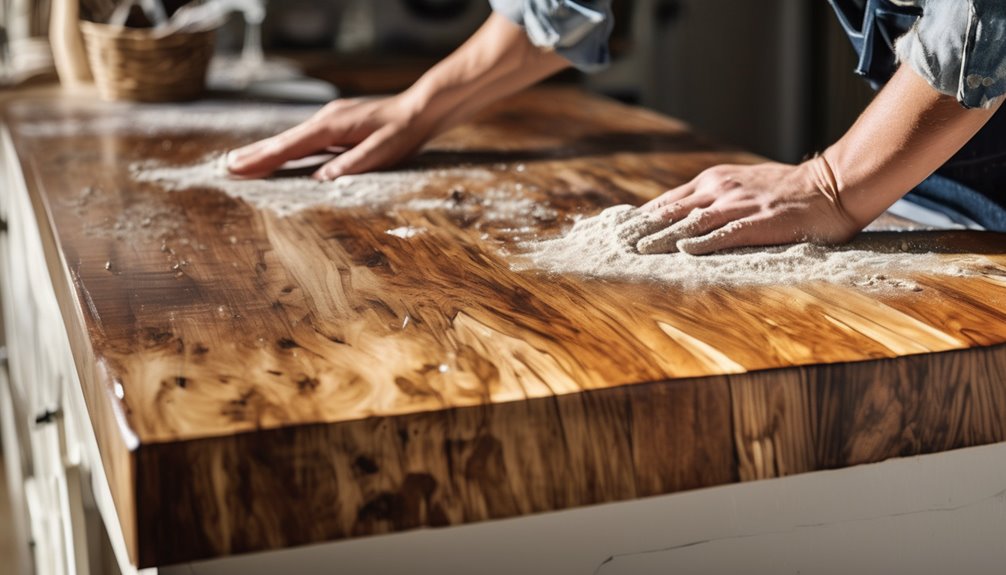
Prep and Installation: Sand, Fit, and Seal for Longevity
Once you’ve shaped your recycled countertop pieces to fit the cabinet layout, it’s time to sand, fit, and seal for longevity. You’ll approach prep steps with steady, deliberate motions to avoid gouges. Begin with a fine-grit sanding sequence, progressing from 120 to 220, keeping surfaces level and edges smooth. Wipe dust between passes and inspect for gaps; minor adjustments now save headaches later. Dry-fit the pieces before final adhesive, ensuring seams are tight and joints flush. Apply a compatible sealant in thin, even coats, following manufacturer directions for cure times. After sealing, buff to a low-lustre finish and test with light tapping to confirm stability. This mindful sequence builds durability and a cohesive look, reinforcing belonging in your DIY kitchen for years to come.
Common DIY Mistakes to Avoid When Upcycling Countertops
Before you start gluing and sealing, be aware of common pitfalls that can derail an upcycled countertop project. First, measure twice, cut once, and resist rushing the prep—uneven surfaces invite failure. Poor surface prep leads to bond failures and chipping; sand smooth, clean thoroughly, and dry completely. Skip shortcuts like mismatched adhesives or incompatible sealants; they create leaks and odors. Plan for support and weight, especially with layered or reclaimed materials. Don’t overlook ventilation when applying coatings. Watch for upcycling pitfalls such as mixing mismatched materials or ignoring cure times. Budget for contingencies to avoid unintended costs that pop up from surprises in material density or thickness. Finally, test small samples before full installation, and document steps so your community can celebrate your progress with you. When you’re choosing sealants, ensure they are compatible with both the countertop materials and the finish you intend to apply to prevent future failures adhesive compatibility.
Maintenance on a Budget: Cleaning, Sealing, and Repairs
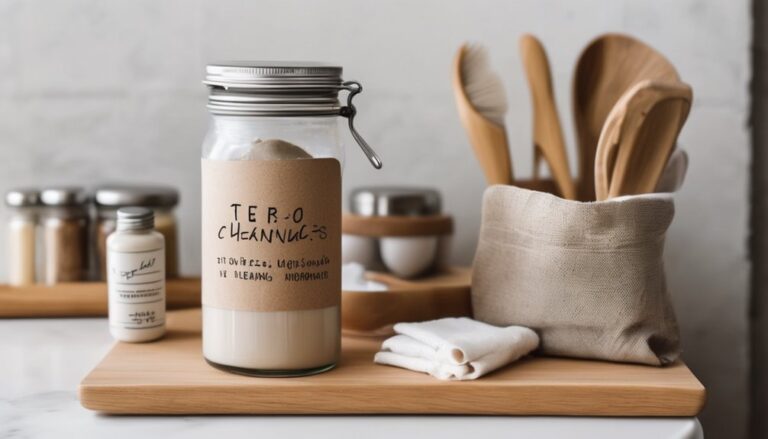
Maintaining an upcycled kitchen countertop on a budget hinges on simple, repeatable steps: clean, seal, and repair promptly to extend its life. You’ll keep it welcoming by sticking to a routine you trust. For cleaning, use a mild, non-abrasive soap and warm water; wipe dry to prevent water staining. Regularly inspect seams and edges—address loose tiles or cracks before they worsen. When sealing, choose a food-safe sealant and apply thin, even coats, following manufacturer directions; recoat as the guidance suggests to maintain a protective barrier. For repairs, patch small chips with a matching filler and sand flush; touch up as needed. This maintenance budget approach reduces recurring costs while you foster pride in your shared, durable workspace. You belong here, keeping countertops resilient and useful. Dishwasher-safe parts
Real-World Budget Snapshots: Case Studies and Cost Breakdowns
You’ll see real-world budgets in action through concise case studies and clear cost breakdowns. We’ll break down material, labor, and tool costs, so you can compare options quickly. Use these snapshots to set your own target budget and choose practical, upcycled choices. In our breakdown, you’ll also note how attachment versatility can influence overall project costs and capabilities.
Real-World Budget Snapshots
How do real-world budgets shape an upcycling project? You’ll learn to map costs against your goals, staying grounded in practical choices and shared values. By acknowledging upcycling ethics, you’ll prefer durable materials, avoid waste, and negotiate responsibly with suppliers. Budget challenges become prompts for smarter decisions, not excuses to quit. You’ll see how tiny savings add up, keeping you connected to your community of makers.
1) Material swaps and stash-surfing: reclaim, test, and reuse to cut waste and expense.
2) Tool and time investments: prioritize versatile tools, plan sessions, and reduce rush fees.
3) Hidden costs awareness: finish options, fasteners, and disposal fees—avoid surprises.
Together, this snapshot helps you stay purposeful, affordable, and connected as you upcycle with integrity.
Case Studies and Cost Breakdowns
So how do real-world budgets translate into concrete upcycling decisions for kitchen countertops? You’ll see how two word idea, two word idea turn plans into actions, balancing cost and durability. In these case studies, you’ll compare material swaps, labor steps, and hidden fees, then map them to your own space. You’ll notice patterns: reuse to reduce waste, simple tools to cut costs, and finish choices that boost longevity. Use these snapshots to sketch your own budget, timeline, and risk tolerance. Table below highlights line items you’ll encounter in typical projects, so you can spot opportunities fast.
| Item | Typical Cost Range | Notes |
|---|---|---|
| Material choice | $10–$45 per sq ft | Local availability matters |
| Tools & supplies | $20–$120 | Rent or borrow when possible |
| Labor time | 4–16 hours | DIY saves substantial margins |
Frequently Asked Questions
How Long Does Upcycled Countertop Epoxy Typically Last?
“Time heals all wounds,” and your upcycled countertop epoxy lasts long if you prep well. Typically, expect 5–10 years with normal kitchen use. If you want longer epoxy durability, seal edges, avoid heat directly, and use proper mix ratios with high-quality resin. You’ll value upcycled materials for sustainability, and you’ll gain confidence by following maintenance steps. With consistent care, you’ll feel a strong sense of belonging in a space that blends form, function, and practical beauty.
Can I Mix Materials for a Single Countertop Project?
Yes, you can mix materials for a single countertop project, but plan carefully to avoid color clash and maintain cohesive strength. Start with a clear palette and test samples so textures don’t fight each other. Use compatible resins and sealants, and account for expansion gaps. You’ll feel belonging when you choose complementary tones and finishes, then document your process. Mix materials intentionally, not accidentally, and keep your workflow steady to prevent weak joints or unexpected color clashes.
Is Professional Sealing Required for All Upcycled Tops?
Yes, professional sealing isn’t mandatory for all upcycled tops, but it’s strongly recommended. You’ll want to assess your project, especially with upcycled materials, and apply a suitable countertop seal to protect against stains and moisture. If you’re unsure, consult product specs and consider a food-safe option for kitchen surfaces. Seals help you belong to a community that values durability, quality, and care. Choose a reputable seal, follow directions, and recoat as needed.
Which Finishes Resist Heat and Stains Best?
You’ll want heat resistant and stain resisting finishes. For best results, choose high-quality epoxy or polyurethane coatings that cure hard and form a durable seal. Avoid waxes and plain oils that wear quickly. Apply in thin, even coats and follow full cure times. Use heat-safe mats and clean spills promptly to preserve the seal. You’ll notice less staining and better durability, so you feel confident entertaining and cooking without worry.
How Do I Fix Chips Without Replacing the Surface?
To fix chips, you can fill them with epoxy maintenance mix and sand smooth for a seamless look. Start by cleaning the area, mixing resin and hardener per directions, then apply thin layers until flush with the surface. Cure fully before light sanding and a final wipe. Keep heat exposure modest to prevent new chips. You’ll feel a sense of belonging as you tackle repairs, and you’ll keep epoxy maintenance simple and effective.