A quick DIY cabinet quiz on cheap upgrades? Start by assessing your space and choosing budget-friendly organizers, clear bins, and adjustable shelves that fit your flow. Declutter first with a 5-minute sweep, then group similar items and label sections to boost visibility. Use slim pull-out trays for spices, vertical storage for lids, and rotating or tiered storage for quick access. Keep trays segmented with dividers and non-slip liners to stay calm under prep—you’ll see big gains fast, and more tips await.
Key Takeaways
- Focus on budget-friendly upgrades like clear bins, adjustable shelves, and slim pull-out trays to maximize space and accessibility.
- Implement labeling, color-coding, and item grouping to improve recognition and reduce rummaging during prep.
- Use vertical storage solutions (tiered racks, rotating trays) to free counter space and enhance visibility.
- Create defined zones with dividers or trays for silverware, lids, spices, and gadgets to speed retrieval.
- Include a quick 5-minute declutter routine to maintain consistency and prevent clutter from creeping back.
How Budget Upgrades Solve Cabinet Clutter and Inefficiency
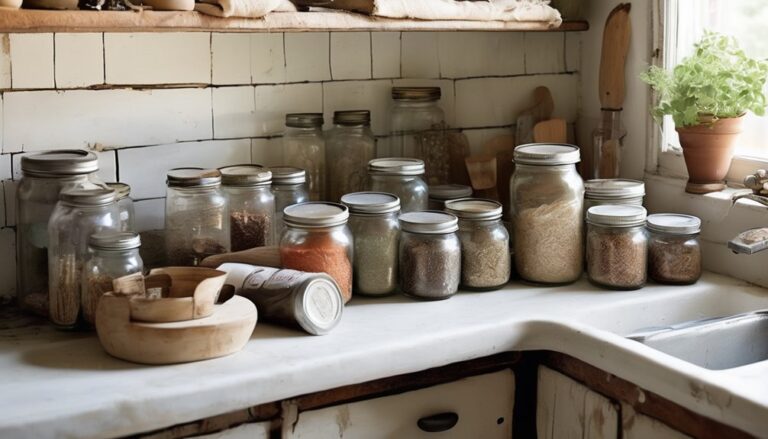
Budget-friendly upgrades can dramatically cut cabinet clutter and boost efficiency. You’ll start by rethinking how you use every inch, focusing on cabinet flow to guide where things live. Think simple upgrades: affordable organizers, clear bins, and adjustable shelves that adapt to your daily routines. Budget hacks like labeling bins and grouping similar items make your cabinet feel calm and connected, so you won’t waste time digging. Prioritize vertical storage to maximize height, freeing countertop space and reducing friction when you cook. Install a slim, pull-out tray for spices or lids, keeping essentials within reach. With intentional placement and clean lines, you create a sense of belonging—every item has a home, and clutter loses its grip. Your space becomes efficient, effortless, and inviting. Vertical storage can dramatically increase usable space while keeping items accessible during busy weeknights.
Quick Budget Assessment for Your Cabinets
A quick budget assessment helps you see where your cabinet needs shine without overhauling the whole setup. You’ll map what you use most, what sits idle, and what’s missing from your daily routine. Start with a quick scan of shelves, doors, and drawers, noting items that cause snagging or clutter. Estimate costs for simple, budget friendly upgrades—new organizers, labels, or adhesive liners—that improve accessibility and efficiency without breaking the bank. Focus on cabinet optimization by choosing solutions that fit your space and flow, not trends. Prioritize changes that deliver the biggest payoff in usability and time saved. Track results over a week, adjusting as needed. This practical approach helps you feel confident, supported, and part of a thoughtful, budget-conscious group. Automatic shutoff guides for safer, energy-efficient operation in compact setups, aligning with the goal of streamlined, clutter-free storage.
Declutter First: 5-Minute Cabinet Cleanout Checklist
If you’re short on time, a quick 5-minute declutter is all you need to reset your cabinets: grab a box, set a timer, and start by removing everything you don’t use weekly, then sort the rest into keep, relocate, or discard piles. This tiny reset creates immediate clarity and signals belonging—your space should respect your routine. Focus on high-use items first, then group similar tools and ingredients together. As you sort, discard duplicates and expired goods, and relocate items to drawers or shelves that fit your flow. Use the “quick cleaning” mindset: wipe surfaces, return items, and reset spaces to function. With declutter ideas guiding you, you’ll feel confident preserving order without overwhelm, and you can maintain stability in your setup just as a desk maintains low-wobble and solid surfaces for long writing sessions stability.
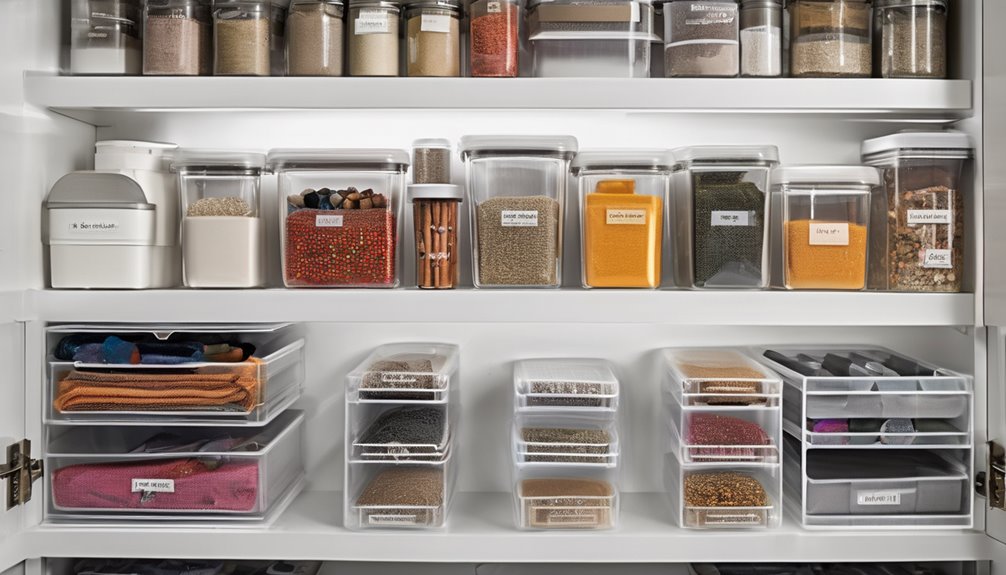
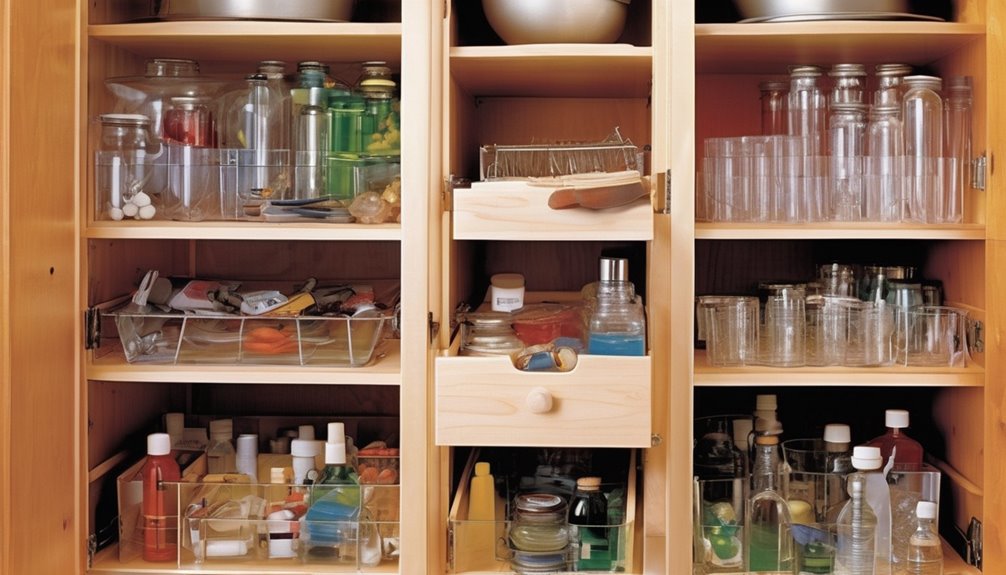
Low-Cost Dividers and Organizers That Make a Big Impact
Efficient organization doesn’t have to cost a fortune: small, inexpensive dividers and organizers can dramatically improve cabinet flow. You don’t need stylish gear to reclaim space; simple, budget friendly tools do the job. Start with adjustable dividers in tall shelves to separate lids, bottles, and gadgets, so items don’t topple when you open doors. Use slim, stackable bins for spices or wraps, maximizing vertical space without crowding. Drawer organizers or tray dividers help categorize utensils, tools, and small gadgets, making daily prep smoother. Label cores or sections so family members know where things belong, reinforcing cabinet organization as a shared habit. Your goal: efficient access, reduced search time, and a calmer, more welcoming kitchen atmosphere. memory presets
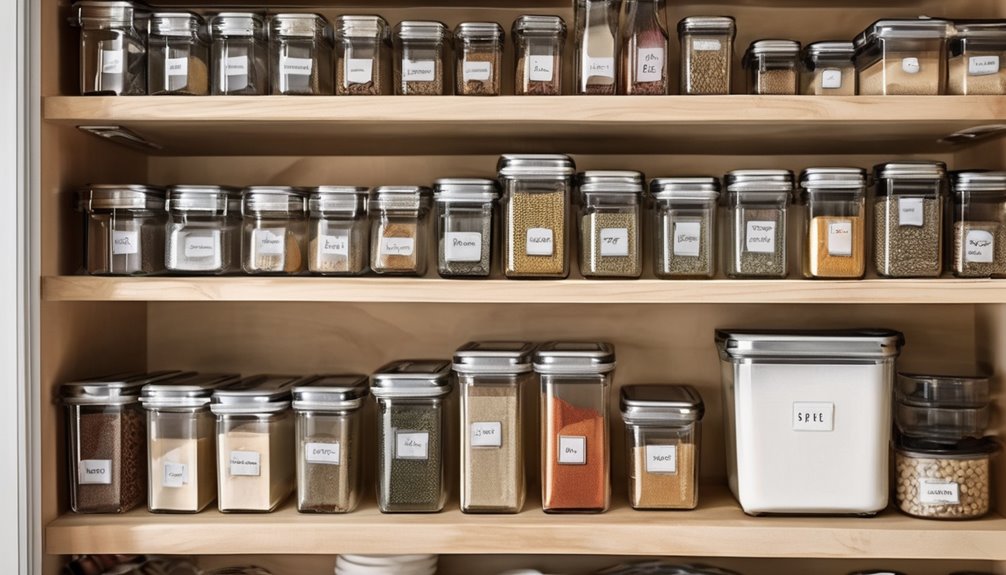
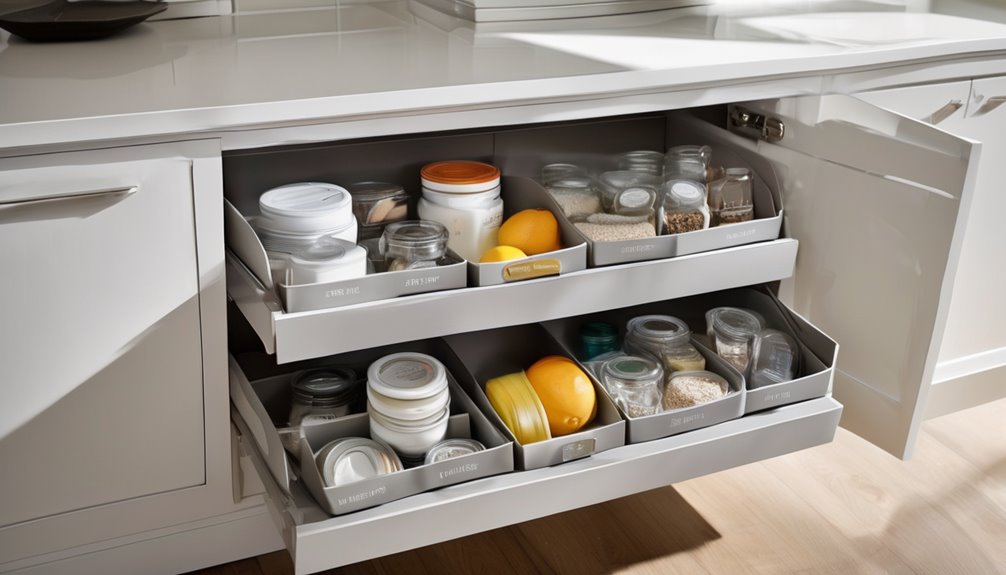
Inside Cabinets: Create Order With Simple Tray Solutions
Tray organization ideas start with simple tray solutions that fit your cabinet size and layout. Consider adjustable dividers, labeled trays, and stacked options to maximize vertical space. With the right tray setup, you’ll keep contents visible, accessible, and neatly grouped. The desk’s emphasis on a solid, one-piece surface mirrors how a clean, uninterrupted tray system can reduce clutter and improve stability in a storage area. lift-cycle endurance projects a long-lasting, dependable foundation for any hardware or tools stored nearby, reinforcing the value of choosing durable, well-supported tray components.
Tray Organization Ideas
Organizing inside cabinets doesn’t have to be messy: start with a few simple tray solutions that corral utensils, lids, and smaller gadgets. You’ll gain immediate order and feel connected to a shared, welcoming space. Use shallow trays to separate silverware from gadgets, and place lids vertically in a slim bin to save space. Pair a tray with non-slip liners to protect surfaces and enhance cabinet aesthetics. Label sections or color-code, so everyone knows where things belong. Regularly rotate items by season to maintain clarity and belonging. Tray organization reduces clutter, boosts accessibility, and invites collaborative kitchen routines. Split utensil tray and the lid organizer add quick access and easy retrieval, supporting efficient meal prep and cleanup. Lid organizer helps keep lids neatly sorted, preventing frustrating rummaging during busy cooking moments.
Cabinet Tray Solutions
Inside cabinets, simple tray solutions can transform clutter into clear, accessible space. You’ll gain instant order when you assign each tray a clear job: silverware, lids, measuring cups, snack packs. A cabinet tray helps you see everything at a glance and grab what you need without digging. Consider budget dividers to create vertical zones within a single tray, so smaller items don’t drift. When you separate items by size and use non-slip liners, contents stay put even with a busy day. Label or color-code sections for quick recognition, then adjust as your routines change. The result is calmer drawers you’re proud to show guests, plus more room for the things you actually use—without costly upgrades. Your kitchen, your organized space. Breathable mesh back
Budget-Friendly Rotating Storage: Lazy Susans and Tiered Racks
Consider how a Lazy Susan can boost accessibility and maximize corner space without breaking the budget. A tiered rack adds vertical organization, letting you store more items in the same cabinet footprint. Which option fits your cabinet layout and daily routines best?
Lazy Susan Advantages
A lazy Susan can save you time and space by turning hard‑to-reach items into easy-to-access options. When you rotate thoughtfully, you gain better visibility, faster retrieval, and less rummaging. This simple upgrade reduces clutter and helps you stay organized with minimal effort. The rotating solution often works well with tiered racks to maximize vertical storage rotation efficiency and keep frequently used items within arm’s reach. You’ll notice quicker meal prep and fewer duplicates, since you can see what you actually own. The rotation efficiency keeps everything in view, so you’re less likely to buy duplicates or overlook essentials. Installation is budget-friendly and scalable to cabinet size, making it feel personal and practical. With a rotating solution, you can customize access zones for everyday staples or specialty items. You’ll enjoy a smoother routine, a tidier space, and a calmer kitchen mindset.
Tiered Rack Benefits
Tiered racks offer a simple, budget-friendly upgrade that maximizes vertical space in your cabinets. You’ll gain easier access to spices, lids, and small jars without digging. A tiered rack keeps items visible, reducing overstock and waste while freeing shelf space for bulk goods. When you open a cabinet, you’ll notice a steadier organization that makes daily tasks smoother, so you feel more confident and in control. The design works with existing shelves, so installation stays quick and affordable. Tiered rack benefits include improved reach, better airflow, and less clutter. If you crave budget friendly pull outs, this option provides comparable access with less cost and fuss. It’s a practical step toward a calmer, more connected kitchen routine. Tiered rack can specifically support tighter spaces common in compact kitchens and help tailor storage to petite cabinet layouts.
DIY Labels and Clear Liners for Instant Visibility
Labeling and clear liners are your fastest route to instant visibility. You’ll grab DIY labels and clear liners, then place them where you actually look—inside doors, on shelves, and near bins. Clear liners protect labels and keep spacing clean, so you don’t guess where items live. This cheap upgrades approach delivers quick, noticeable changes without a big investment. When you create simple labels, use short words and bold type so you read them at a glance. Pair labels with clear liners for a cohesive look that feels organized and welcoming. You’ll experience less rummaging and more confidence in your space, which reinforces belonging in your home. Start with a few high-traffic spots and expand as you enjoy the instant visibility. Simplified layouts reduce foam and clutter, improving overall usability clear liners.
How to Choose Budget-Friendly Pull-Out Solutions That Work
When you’re choosing budget-friendly pull-out solutions, start with what fits your cabinet depth and weight needs. Look for simple, sturdy designs that maximize unused space without overspending, and prioritize easy installation. Think practical space optimization: a few well-placed pulls can transform messy cabinets into organized storage without breaking the bank.
Budget-Friendly Pull-Outs
Pull-out organizers don’t have to break the bank. When you’re choosing budget-friendly pull-outs, start with measured needs over fancy features. Look for sturdy slides (prefer ball-bearing or soft-close) that suit the cabinet size you already have. Prioritize easy installation and compatibility with existing shelves, so you don’t overbuild. Consider standard widths and heights to keep costs down and options open. Focus on load capacity: you want smooth operation without sag. For tight budgets, DIY-ready kits or modular kits can provide solid performance without a premium price. Read reviews about reliability and noise. Keep your goal in mind: maximize space, minimize effort, and keep the look cohesive with the rest of the kitchen. budget friendly pull outs, done right, feel like belonging.
Practical Space Optimization
Ever wonder how to squeeze the most from budget-friendly pull-out solutions without overpaying or overbuilding? You can pick simple, sturdy options that fit your space and routine. Focus on flexibility: shallow bins for small items, tall trays for spices, and quiet slides for ease of use. Measure clearance, weight, and cabinet depth to prevent sticking or wobble. Prioritize clean installation, then add dividers for clutter relief and quick access. Budget upgrades don’t have to feel temporary; choose reliable hardware and modular stacks you can reconfigure later. Your goal is repeatable setups you actually use, not fancy gimmicks.
Creative Upcycling for Narrow Cabinets
Looking for clever ways to maximize a narrow cabinet? You can transform tight spaces with creative upcycling that feels practical and inclusive. Think simple fixes first: modular risers, slim pull-out trays, and hanging racks that respect existing shelves. By repurposing items you already own, you’ll create focused, accessible storage that fits your routine. Prioritize narrow storage solutions that keep essentials visible and easy to grab, reducing rummaging and frustration. Use labeled bins or dividers to maintain order, and choose low-profile hardware that doesn’t crowd the space. With intentional tweaks, you’ll gain confident, shareable results you’re proud to show off to family or roommates. Your cabinet becomes a responsive, collaborative feature of daily life, not a stubborn obstacle.
- Modular risers and slim pull-out trays
- Hanging organizers for vertical space
- Labeled bins and dividers for quick access
Quick-Turnaround Maintenance Tips to Keep Cabinets Shiny
Quick-turnaround cabinet maintenance keeps shine without a full scrub. You’ll keep cabinets gleaming with simple steps you can do weekly: dust, wipe with a damp microfiber, and dry to prevent streaks. Quick polish with a dedicated spray preserves veneer and avoids buildup. Spot-clean hinges and handles to prevent fingerprint grime. Consider subtle lighting to reveal surfaces without harsh glare, and ensure hinge alignment so doors close neatly, reducing wear. This routine makes your space feel welcoming and organized.
| Quick tips | Why it helps |
|---|---|
| Subtle lighting | Enhances shine without glare |
| Hinge alignment | Keeps doors aligned and durable |
Consistency matters: small maintenance boosts big impact, helping you belong in a tidy, calm kitchen.
Frequently Asked Questions
How Soon Can I See Results From Cheap Cabinet Upgrades?
Results show in days to a couple weeks, depending on the upgrade. You’ll notice quick wins like clearer shelves and smoother drawers right away, with bigger changes—labels, organizers, and paint—showing within the first week. For long term durability, choose solid hardware and proper mounting. You’ll feel a sense of belonging as things look organized and stay that way. Stick with a simple plan, and you’ll keep momentum and enjoy sustained improvements over time.
Do DIY Solutions Require Tools I Don’T Own?
Yes, some DIY solutions require tools you don’t own. But you can start small with basics and budget hacks, then decide what to add. You’ll find DIY tools you actually need are affordable and worth the investment for future projects. Start with measuring tapes, screwdrivers, and a drill if possible. You’ll feel part of a community sharing quick, practical tips, and you’ll gain confidence as you upgrade with simple, cost-conscious DIY tools.
Are There Weight Limits for Budget Organizers?
Yes—there can be weight limits on budget organizers, vary by product, and you should check the label. You’ll avoid overloading by choosing units built for the task and spreading weight evenly. Look for a clear weight limit, sturdy materials, and reinforced joints. If you’re assembling shelves yourself, don’t exceed rated capacities and distribute items across multiple organizers. When in doubt, opt for higher-capacity budget organizers to feel confident and belong.
Can These Upgrades Work in Oddly Shaped Cabinets?
Yes, these upgrades can work in oddly shaped cabinets. Start by measuring wonky spaces, then pick slim organizers and adjustable shelves to maximize every inch. Don’t fear gaps—use swing-out trays and pull-out baskets to access difficult corners. For a fast win, paint the interior a light color to open the space. You’ll feel like you belong with cabinet hacks that finally fit your layout, even with tight, odd shapes.
How Long Do Budget Improvements Last Before Replacement?
Budget longevity depends on your materials and care, but budget upgrades typically last 3–5 years with decent use and proper maintenance. You’ll know replacement timing when panels start sagging, hardware loosens, or finish wears through. Keep up with tightening screws, re-oiling hinges, and resealing shelves to stretch life. If you want lasting belonging, pick durable basics now, and plan refreshes as needed. Track wear, budget for replacements, and you’ll stay aligned with practical, shared spaces.